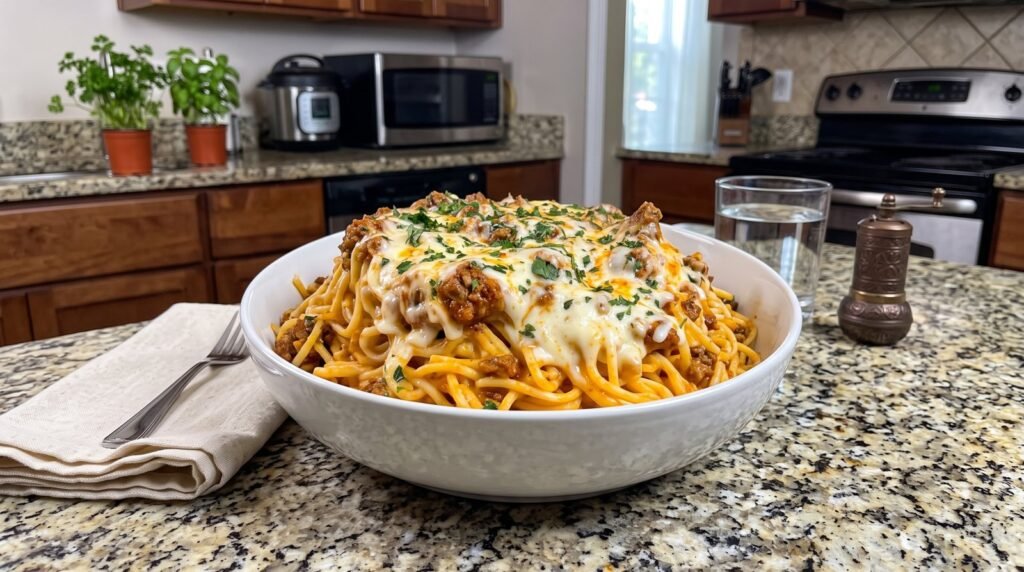

We have all been there. It is six o clock on a weekday evening, the kitchen is chaotic, the kids are asking when dinner will be ready for the fifth time, and you are staring into the pantry hoping for a culinary miracle. Spaghetti is the obvious, reliable choice. It is fast, cheap, and everyone eats it. But let us be honest: standard spaghetti night can get a little boring. The noodles slide off the fork, the sauce pools at the bottom of the bowl, and by the end of the meal, you are left with a pile of cold, watery pasta remnants that nobody wants to touch.
A few years ago, after one too many underwhelming pasta nights, I decided to shake things up. I wanted the comforting, rich flavors of a slow-baked lasagna, but without the tedious layering process and the expensive grocery bill. I wanted something that felt like a celebration but could still be thrown together on a busy Tuesday. That was the night I developed this baked spaghetti recipe.
The first time I pulled this dish out of the oven, my kitchen filled with the aroma of toasted garlic, bubbling cheese, and savory Italian herbs. When I set the baking dish on the table, my family went completely quiet. The top was a golden, bubbly blanket of melted mozzarella and cheddar, speckled with fresh green parsley. Underneath that cheese crust was a mountain of perfectly cooked pasta coated in a velvety, rich sauce. There were no leftovers that night. In fact, my kids were practically scraping the sides of the baking dish to get every last bit of crispy cheese.
Since then, this cheesy baked spaghetti has become my ultimate secret weapon for potlucks, family gatherings, and those nights when we just need a big, warm hug in food form. Today, I am going to share every tip, trick, and lesson I have learned along the way so you can recreate this crowd-pleasing masterpiece in your own kitchen.
Why This Baked Spaghetti is Different
If you have ever had a dry, block-like pasta casserole at a neighborhood potluck, you might be skeptical about baked spaghetti. Traditional pasta bakes often suffer from two major flaws: they are either incredibly dry because the noodles absorbed all the sauce, or they are mushy because the pasta was overcooked before it even went into the oven.
This recipe solves both of those problems through a few simple culinary techniques. First, we undercook the spaghetti slightly during the initial boil. This ensures that as the pasta bakes in the oven, it absorbs the delicious juices from the meat sauce without becoming soft or bloated.
Second, we do not just toss the pasta in red sauce. Instead, we coat the hot noodles in a luscious, creamy mixture of cream cheese and sour cream. This creates a protective, velvety barrier around each strand of spaghetti. Not only does this keep the pasta incredibly moist, but it also adds a rich, tangy depth of flavor that contrasts beautifully with the acidic tomato sauce.
Finally, we do not skimp on the cheese. By using a combination of whole-milk mozzarella for that classic, epic cheese pull and a bit of sharp cheddar or Colby Jack for flavor contrast, we create a topping that is impossible to resist.
The Ingredient List
Before we jump into the kitchen, let us look at what you will need. Most of these ingredients are pantry staples, but choosing the right versions of them will make a massive difference in your final dish.
| Ingredient | Quantity | Purpose |
|---|---|---|
| Spaghetti noodles | 16 ounces (1 pound) | The sturdy base of our comforting dish |
| Lean ground beef | 1 pound | Provides a hearty, classic meat texture |
| Sweet Italian sausage | 1 pound | Adds deep, savory herbs and richness to the sauce |
| Yellow onion | 1 medium | Finely diced to build a sweet, aromatic flavor base |
| Garlic cloves | 6 cloves | Freshly minced for that unmistakable savory punch |
| Marinara sauce | 48 ounces (2 jars) | Use a high-quality, low-sugar brand for the best flavor |
| Cream cheese | 8 ounces | Softened to coat the noodles in a silky, rich layer |
| Sour cream | 0.5 cup | Adds a subtle tang and keeps the pasta incredibly moist |
| Dried Italian seasoning | 1.5 tablespoons | A fragrant blend of oregano, basil, rosemary, and thyme |
| Shredded mozzarella cheese | 3 cups | Shredded fresh from a block for the ultimate melt |
| Shredded Colby Jack or Cheddar | 1 cup | Adds color, richness, and a sharp flavor note |
| Fresh flat-leaf parsley | 0.25 cup | Finely chopped for a bright, fresh garnish |
| Salt and black pepper | To taste | Essential for highlighting all the individual flavors |
Step-by-Step Instructions
Now that your ingredients are prepped and ready on the counter, let us walk through the process of bringing this dish together. Grab a large pot for your pasta, a heavy-duty skillet for your meat sauce, and your favorite 9×13 inch baking dish.
Step 1: Cook the Spaghetti to a Firm Al Dente
Fill a large pot with water and bring it to a rolling boil over high heat. Once the water is boiling, add a generous tablespoon of salt. Do not skip this step; salting the water is your only chance to flavor the inside of the pasta itself.
Drop your spaghetti noodles into the boiling water. Stir them immediately to prevent them from sticking together. Cook the pasta for about two minutes less than the package instructions for al dente. If the box says eleven minutes, cook it for nine. The noodles should still have a very noticeable bite in the center. They will finish cooking and softening inside the oven as they bake in the sauce.
Once the pasta is done, drain it in a colander. Do not rinse the pasta with water. The natural starches left on the surface of the noodles will help the cream cheese mixture stick to them.
Step 2: Build the Rich Meat Sauce
While your pasta water is heating up, you can start on the sauce. Heat a large skillet or Dutch oven over medium-high heat. Add your ground beef and sweet Italian sausage. Use a wooden spoon to break the meat apart into small crumbles as it cooks.
Cook the meat until it is completely browned and no pink remains. This should take about eight to ten minutes. Once cooked, carefully drain off most of the excess grease, leaving about a tablespoon in the pan. That leftover fat holds a ton of flavor from the Italian sausage.
Turn the heat down to medium. Add your finely diced yellow onion to the skillet with the meat. Cook for about five minutes, stirring occasionally, until the onion becomes soft and translucent.
Next, add your minced garlic and dried Italian seasoning. Cook for just one minute. You will know it is ready when the kitchen suddenly smells like a high-end Italian trattoria. Be careful not to let the garlic brown or burn, as burnt garlic turns bitter and can ruin the flavor of your entire sauce.
Pour in both jars of marinara sauce. Stir everything together until the meat and onions are fully integrated into the sauce. Turn the heat down to low and let the sauce simmer gently for about ten minutes. This gives the dried herbs time to rehydrate and allows the flavors of the beef, sausage, and tomatoes to meld together. Taste the sauce and add salt and pepper as needed.
Step 3: Create the Creamy Noodle Layer
While your sauce is simmering, grab a large mixing bowl. Add your softened cream cheese and sour cream. Use a sturdy whisk or a hand mixer to beat them together until the mixture is completely smooth and free of lumps.
If your cream cheese is too cold, it will not blend smoothly and you will end up with little white specks throughout your pasta. If you forgot to pull your cream cheese out of the fridge ahead of time, you can microwave it on low power for fifteen seconds to soften it up.
Add your warm, drained spaghetti noodles directly into the bowl with the cream cheese mixture. Toss the noodles gently using a pair of tongs. Continue mixing until every single strand of spaghetti is coated in the creamy, white glaze. The heat from the freshly cooked pasta will help melt the cream cheese, making this step incredibly easy.
Step 4: Assemble the Masterpiece
Preheat your oven to 375 degrees Fahrenheit. Lightly grease your 9×13 inch baking dish with cooking spray or a little bit of olive oil.
Now, we begin the assembly process. Spread about one cup of your warm meat sauce over the bottom of the prepared baking dish. This creates a rustic, saucy barrier that prevents the bottom layer of noodles from sticking to the dish or drying out during the bake.
Next, transfer half of your creamy spaghetti noodles into the dish, spreading them out into an even layer. Pour half of your remaining meat sauce directly over the noodles. Use a spatula to smooth it out so it covers the pasta completely. Sprinkle one cup of shredded mozzarella cheese evenly over the meat sauce.
Add the rest of the creamy spaghetti noodles on top of the cheese layer. Pour the remaining meat sauce over the second layer of pasta, smoothing it out to the edges.
Finally, mix your remaining two cups of mozzarella and your cup of Colby Jack or Cheddar cheese together. Sprinkle this beautiful cheese blend evenly over the entire top of the dish. The cheddar adds a gorgeous golden-orange color that makes the final dish look absolutely stunning.
Step 5: Bake to Bubbly Perfection
Tear off a sheet of aluminum foil big enough to cover your baking dish. Spray the shiny side of the foil with a little bit of cooking spray, or tent it slightly so it does not touch the cheese. There is nothing more heartbreaking than pulling your baked spaghetti out of the oven only to have the entire cheesy top layer stick to the foil.
Cover the dish tightly with the foil and pop it into the preheated oven. Bake for twenty minutes. This initial covered bake traps the steam, heating the dish all the way through and melting the cheese without drying out the pasta.
After twenty minutes, carefully remove the foil. Turn your oven to the broil setting for the last two to three minutes of cooking. Keep a very close eye on it during this time. You want the cheese to brown slightly, creating those gorgeous, toasted spots and crispy edges, but it can go from perfect to burnt very quickly.
Once the top is bubbling and golden-brown, remove the baked spaghetti from the oven. Set the dish on a wire rack or a heat-safe trivet.
Step 6: The Hardest Part, Letting it Rest
I know how tempting it is to plunge a serving spoon directly into that bubbling, cheesy mountain the second it comes out of the oven. Your kitchen will smell incredible, and your family will likely be lining up with plates in hand. But you must resist the temptation.
Let the baked spaghetti rest undisturbed on the counter for ten to fifteen minutes.
Just like a lasagna or a holiday roast, this resting period is crucial. When the dish is piping hot, the sauces and melted cheeses are very fluid. If you cut into it immediately, the structure will collapse, and the sauce will run everywhere, leaving you with a messy plate. As the dish cools slightly, the starches in the pasta settle, and the cream cheese layer firms up just enough to hold everything together. This ensures that when you scoop out a serving, it holds its shape beautifully on the plate.
Right before serving, sprinkle the finely chopped fresh parsley over the top. The bright green color contrasts beautifully with the red sauce and golden cheese, and the fresh herbal flavor cuts through the rich, heavy layers of the dish.
My Kitchen Disasters: What I Learned Along the Way
Every great recipe is built on a foundation of mistakes, and this one is no exception. Over the years, I have made several blunders with this dish that taught me valuable lessons.
The first big mistake I ever made was using thin spaghetti. I had a box of angel hair in the pantry and figured it would work just fine. It did not. Thin pasta shapes simply do not have the structural integrity to withstand a double-cooking process. By the time the dish came out of the oven, the delicate noodles had dissolved into a mushy texture that resembled baby food. Since that day, I have stuck strictly to standard spaghetti, bucatini, or even penne. You need a noodle that can stand up to the heavy meat and cheese.
My second disaster involved using pre-shredded cheese from a bag. I was in a rush, so I grabbed a couple of bags of pre-shredded mozzarella. When the bake was finished, the cheese had melted into a weird, plastic-like sheet that separated from the sauce. It was greasy, tough, and had almost no stretch.
After doing a little research, I discovered why: pre-shredded bagged cheeses are coated in potato starch, powdered cellulose, and natamycin to keep the shreds from clumping together in the bag. These additives also prevent the cheese from melting smoothly. Now, I always buy blocks of low-moisture, whole-milk mozzarella and grate them myself using a box grater. It takes an extra five minutes, but the resulting melt is incredibly smooth, creamy, and stretchy.
Lastly, I once tried to make this using a very cheap, generic brand of store-bought marinara. Because inexpensive sauces are often loaded with sugar and water, the final dish turned out incredibly sweet and watery. To fix this, always look for a marinara sauce that lists tomatoes, olive oil, garlic, and herbs as the primary ingredients, with little to no added sugar. If your sauce feels a bit too acidic, you can always balance it with a tiny pinch of sugar yourself, but starting with a quality base is non-negotiable.
Flavor Customizations and Variations
One of the things I love most about this recipe is how incredibly versatile it is. Once you have mastered the basic technique, you can easily adapt it to suit your family's preferences or clean out whatever ingredients you have in your refrigerator.
If you like a bit of heat, try swapping out the sweet Italian sausage for hot Italian sausage. You can also toss a teaspoon of crushed red pepper flakes into the garlic and onion mixture while it cooks. This gives the sauce a subtle, warming kick that pairs beautifully with the rich, creamy cheese layer.
For a vegetarian twist, you can omit the ground beef and sausage entirely. Instead, sauté a mixture of sliced cremini mushrooms, diced zucchini, bell peppers, and baby spinach in a little olive oil before adding your marinara sauce. The earthy flavor of the mushrooms provides a meaty texture that even carnivores will appreciate.
If you want an even richer, more lasagna-like experience, you can swap out the sour cream for a cup of high-quality ricotta cheese. Mix the ricotta with an egg yolk and half a cup of grated parmesan cheese before tossing it with the spaghetti. This creates a fluffy, light, and deeply savory layer that is absolutely luxurious.
For a smoky flavor profile, try swapping the Colby Jack cheese on top for shredded smoked provolone or gouda. The smoky notes pair wonderfully with the rich meat sauce and roasted garlic.
How to Make This Dish Ahead of Time
This baked spaghetti is an absolute dream for meal prepping and busy schedules. If you want to get a head start on dinner, you can assemble the entire dish up to twenty-four hours in advance.
Simply follow the instructions all the way through the assembly step, but do not bake it. Instead, let the meat sauce cool completely, cover the baking dish tightly with plastic wrap, and store it in your refrigerator.
When you are ready to eat, pull the dish out of the fridge and let it sit on the counter for about thirty minutes to take the chill off. Remove the plastic wrap, cover the dish with sprayed aluminum foil, and bake at 375 degrees Fahrenheit. Because the dish is cold from the fridge, you will need to add about ten minutes to the covered baking time to ensure that the middle gets hot and bubbly.
You can also freeze this dish for an easy weeknight meal down the road. I like to assemble the spaghetti in a disposable aluminum baking pan, cover it tightly with two layers of plastic wrap, and then wrap it in heavy-duty aluminum foil. It will keep beautifully in the freezer for up to three months.
When you are ready to use it, let it thaw completely in your refrigerator overnight, then bake as directed. It is the perfect meal to deliver to a friend who just had a baby, a neighbor recovering from surgery, or anyone who could use a little extra comfort.
Storing and Reheating Leftovers
If you happen to have any leftovers, count yourself lucky. Like many pasta dishes, this baked spaghetti tastes even better the next day as the flavors continue to develop and meld together in the fridge.
Store any remaining spaghetti in an airtight container in the refrigerator for up to four days.
When it comes to reheating, you want to avoid using the microwave if possible. While the microwave is fast, it can unevenly heat the dish and cause the cheese to become rubbery and the sauce to separate.
Instead, place a portion of the baked spaghetti in an oven-safe dish. Splash a tablespoon of water or extra marinara sauce over the top to replenish any moisture that was lost in the fridge. Cover the dish with foil and bake at 350 degrees Fahrenheit for about fifteen to twenty minutes, or until the center is hot and the cheese is melted and bubbly once again.
If you are in a rush and must use the microwave, place a damp paper towel over the bowl. This traps the steam, keeping the pasta moist and helping the cheese reheat smoothly. Heat on medium power in one-minute increments, stirring occasionally, until hot.
Final Thoughts on This Comfort Food Classic
At the end of the day, cooking is about more than just combining ingredients on a plate. It is about creating moments of connection, warmth, and joy around the dinner table. In our fast-paced lives, those moments can sometimes feel hard to come by.
That is why recipes like this one are so special. It does not require fancy techniques, exotic ingredients, or hours of painstaking labor. It is simple, honest, and incredibly delicious food that brings people together.
The next time you are staring at a box of spaghetti in your pantry and wondering what to make for dinner, I hope you will give this recipe a try. Gather your family, grate some fresh cheese, fill your kitchen with the scent of garlic and herbs, and enjoy a meal that is guaranteed to bring smiles to everyone around your table. Happy cooking!