
We have all been there. You are hosting a game night, or maybe you just have an intense late-night craving for something warm, salty, and incredibly satisfying. You buy a block of cheese, cut it into sticks, dip them in some flour and egg, toss them into hot oil, and hope for the best.
A few minutes later, you peer into the pot only to find a tragic scene. The breading has split open, and your beautiful cheese has completely escaped into the oil, leaving behind empty, hollow husks of crispy breading and a kitchen filled with acrid, smoky oil smoke.
I lived that exact tragedy during my college years when I volunteered to make appetizers for a huge football party. I ended up serving what I shamefully called potato skin shells without the potatoes, which were really just oily breading tubes. The cheese had melted, bonded with the bottom of my Dutch oven, and charred into a black mass.
It took me years of trial and error, dozens of messy cleanups, and a lot of grease-splattered aprons to figure out the exact science of the perfect homemade mozzarella stick. Today, I am going to share everything I learned so you never have to witness a cheese explosion in your kitchen again.
The Science of the Perfect Cheese Pull
To understand how to make a perfect mozzarella stick, we have to look at the cheese itself. Not all mozzarella is created equal. If you grab a ball of fresh, water-packed buffalo mozzarella from the deli section, you are setting yourself up for failure.
Fresh mozzarella has a incredibly high water content. When heated, that water turns into steam. The steam creates high pressure inside the breading, forcing it to pop open like a balloon.
For the ultimate cheese pull, you need low-moisture, part-skim mozzarella. The moisture content is low enough that it will melt into gooey ribbons without boiling and steaming out of its shell.
Interestingly, pre-packaged string cheese is actually your best friend here. String cheese is made by heating mozzarella to a high temperature and then stretching it. This process aligns the milk proteins in a single direction, which is exactly what gives it that signature stringy texture. When you bread and fry string cheese, those aligned proteins melt beautifully, giving you a stretch that can easily reach from your mouth to your outstretched arm.
Why Double Breading is Non-Negotiable
If there is one absolute rule of making homemade mozzarella sticks, it is this: you must double bread them. A single layer of flour, egg, and breadcrumbs is simply too thin to contain melting cheese.
As the cheese heats up, it expands. It will easily find the tiniest microscopic gap in a single layer of breading and ooze out. Double breading creates an impenetrable, reinforced concrete wall around your cheese.
The process is a bit messy, and your hands will inevitably end up looking like monstrous club-shaped paws of dough, but it is the only way to guarantee success. We use a wet-hand, dry-hand technique to keep things as clean as possible, which I will explain in detail in the step-by-step section.
The Secret Ingredient: Cornstarch
Most traditional recipes tell you to use plain all-purpose flour for the first dredge. While that works okay, I discovered a game-changing secret a few years ago: cornstarch.
Replacing a portion of your flour with cornstarch, or using a mix of both, creates a much crispier shell. Cornstarch does not form gluten when mixed with moisture. Gluten can make fried coatings a bit chewy or leathery if they sit for more than a few minutes.
Cornstarch, on the other hand, absorbs moisture and fries up into an incredibly brittle, glass-like crunch that stays crispy even after cooling down.
Ingredients for the Ultimate Crispy Mozzarella Sticks
Before we dive into the method, let us look at the ingredients. I like to heavily season every single layer of the breading. If you only season the breadcrumbs, the inner layers of flour and egg will taste bland and papery.
Here is the exact breakdown of what you will need.
| Ingredient | Quantity | Purpose |
|---|---|---|
| Low-moisture part-skim mozzarella string cheese | 12 sticks | The star of the show; perfect melting profile |
| All-purpose flour | 0.75 cup | First layer of defense; helps egg adhere |
| Cornstarch | 0.25 cup | Creates an ultra-shatteringly crispy crust |
| Large eggs | 3 eggs | The binder that glues the breadcrumbs down |
| Whole milk | 2 tablespoons | thins out the egg wash slightly for even coating |
| Italian style breadcrumbs | 1 cup | Classic, fine texture for total coverage |
| Panko breadcrumbs | 1 cup | Japanese style flaky crumbs for maximum crunch |
| Garlic powder | 1.5 teaspoons | Divided between flour and breadcrumbs for flavor |
| Onion powder | 1 teaspoon | Adds depth to the breading mix |
| Dried oregano | 1 teaspoon | Classic Italian herb flavor profile |
| Dried basil | 1 teaspoon | Works in tandem with oregano for aroma |
| Fine sea salt | 1.5 teaspoons | Crucial for bringing out the savory notes |
| Freshly cracked black pepper | 1 teaspoon | Adds a tiny bit of heat and bite |
| Neutral oil (Canola, Peanut, or Vegetable) | 4 cups | For frying; must have a high smoke point |
Step-by-Step Preparation: The Assembly Line
Do not try to wing this process. It requires organization. Clear off your kitchen counter and set up a proper assembly line.
You will need three shallow bowls or pie dishes, a large baking sheet lined with parchment paper, and a wire cooling rack.
Step 1: Prep the Cheese
Take your string cheese out of the refrigerator. If you are using standard-sized string cheese sticks, I highly recommend cutting them in half crosswise. This makes them much easier to handle, bread, and fry.
Keep them cold. Do not let them sit out on the counter to warm up to room temperature. We actually want them to be cold when they hit the breading station.
Step 2: Set Up Your Bowls
Line up your three shallow bowls from left to right.
In the first bowl, whisk together the all-purpose flour, cornstarch, half of the salt, half of the garlic powder, and half of the onion powder. This is your dry dredge.
In the second bowl, crack the eggs and add the milk. Whisk them vigorously with a fork until they are completely homogenous, with no stringy egg whites remaining.
In the third bowl, combine the Italian breadcrumbs, Panko breadcrumbs, the remaining garlic powder, onion powder, dried oregano, dried basil, the rest of the salt, and the black pepper. Mix these together thoroughly with your fingers to distribute the herbs evenly.
Using a mix of regular Italian breadcrumbs and Panko is my favorite trick. The fine Italian crumbs fill in all the tiny gaps, while the large, flaky Panko crumbs create a jagged, super-crunchy exterior texture.
Step 3: The Wet-Hand, Dry-Hand Method
This technique is essential if you want to avoid breading your own fingers. Decide which hand will be your dry hand and which will be your wet hand.
Use your dry hand to pick up a cheese stick and drop it into the first bowl (flour and cornstarch mixture). Use your dry hand to toss the flour over the cheese until it is completely coated. Shake off any excess flour. The cheese should look dusty, not caked.
With your dry hand, drop the floured cheese stick into the second bowl (egg wash).
Switch to your wet hand. Turn the cheese stick over in the egg wash until every square millimeter is wet.
Lift the cheese stick out of the egg wash, let the excess drip off for a couple of seconds, and drop it into the third bowl (breadcrumbs).
Switch back to your dry hand. Toss the breadcrumbs over the wet cheese stick. Press down firmly on the cheese stick to bury it in crumbs. You want to physically press the crumbs into the egg layer so they stick securely. Roll it around, ensuring the ends of the stick are heavily coated too.
Now, do not stop here! This is only single-breaded.
Take that breaded cheese stick and drop it back into the egg wash using your dry hand.
Use your wet hand to coat it in egg once again. Ensure that any dry patches of breadcrumbs are thoroughly soaked.
Lift it out, let it drip, and drop it back into the breadcrumbs for the second and final time.
Use your dry hand to bury it in breadcrumbs again, pressing firmly on all sides, especially on the ends. Roll the stick between your palms gently to help shape it into a neat cylinder and to lock the crumbs in place.
Place the double-breaded mozzarella stick onto your parchment-lined baking sheet. Repeat this process with the remaining cheese sticks.
Step 4: The Crucial Freeze
If you ignore this step, your mozzarella sticks will fail. There are no shortcuts here.
Once all your sticks are beautifully double-coated and resting on the baking sheet, place the entire sheet into your freezer. You must leave them in there for at least two hours. Overnight is even better.
Let me explain why this is so critical. Frying is an race against time. We want the outer breading to turn beautifully golden brown and crispy before the inner cheese melts completely and explodes out.
If you fry a room-temperature or even a refrigerator-cold mozzarella stick, the cheese will reach its melting point way too fast, long before the breadcrumbs have time to brown.
By freezing the sticks solid, you give the breadcrumbs a massive head start. When dropped into hot oil, the outer layer immediately begins to crisp and brown. The ice-cold cheese inside slowly warms up, melting perfectly just as the breading reaches its peak golden-brown color.
Step 5: Heating the Oil
When you are ready to fry, choose a heavy-bottomed pot, like a cast-iron Dutch oven or a deep saucepan. You want something with high sides to protect your stovetop from oil splatters.
Pour in your neutral frying oil until it is at least two inches deep. This ensures the mozzarella sticks can submerge completely without touching the bottom of the pot, which can cause hot spots and premature popping.
I cannot stress this enough: you need a kitchen thermometer. Frying by eye is a guessing game that usually ends in burnt breadcrumbs or oil-soaked soggy cheese.
Clip your thermometer to the side of the pot and heat the oil over medium heat. You want to reach a stable temperature of 375 degrees Fahrenheit (190 degrees Celsius).
If your oil is too cold (below 350 degrees Fahrenheit), the breading will absorb the oil like a sponge, making the sticks incredibly greasy, and the cheese will melt and leak out before the crust can crisp.
If your oil is too hot (above 400 degrees Fahrenheit), the breading will burn to a dark brown char while the cheese inside remains a solid, cold plug.
Step 6: Frying to Golden Perfection
Once your oil has held steady at 375 degrees Fahrenheit for a few minutes, retrieve your mozzarella sticks from the freezer. Do not take them out beforehand; they should go directly from the frozen tundra of your freezer into the bubbling oil.
Working in small batches of four or five at a time, gently lower the frozen sticks into the hot oil using a slotted spoon or metal spider. Do not crowd the pot. If you drop all twelve sticks in at once, the oil temperature will plummet, and you will end up with greasy, soggy sticks.
Keep an eye on your thermometer. You may need to turn up the heat slightly to compensate for the cold sticks, then turn it down as the oil recovers.
Fry the sticks for about 1.5 to 2 minutes. You want to look for a deep, golden-brown hue.
The moment you see even a tiny speck of white cheese begin to poke through the breading, immediately fish that stick out of the oil. That is your warning sign that the cheese has melted completely and is ready to rupture.
Step 7: The Correct Way to Cool
As you lift the crispy golden sticks out of the oil, do not place them directly onto a plate lined with paper towels.
This is a very common mistake. When hot, fried food sits on a flat paper towel, steam gets trapped underneath. That steam softens the bottom crust, turning your beautifully crispy sticks soggy within minutes.
Instead, place them onto a metal wire cooling rack set inside a baking sheet. This allows air to circulate completely around the sticks, keeping them incredibly crispy on all sides.
If you want, you can sprinkle a tiny pinch of flaky sea salt or finely grated Parmesan cheese over them the second they come out of the fryer while they are still hot and glistening with a micro-layer of oil. This helps the salt stick.
Alternative Cooking Methods: Air Frying and Baking
While deep frying is undoubtedly the gold standard for taste and texture, I know many people prefer to avoid deep frying at home because of the smell or the extra calories.
You can absolutely bake or air fry these, but you have to modify your technique slightly to ensure they still get crispy without exploding.
The Air Fryer Method
Preheat your air fryer to 400 degrees Fahrenheit (200 degrees Celsius).
Because air fryers use dry convection heat, you need to introduce some fat to help the breadcrumbs brown. Without oil, Panko crumbs will stay a pale, dry white and will taste chalky.
Take your frozen mozzarella sticks and mist them heavily with a high-quality cooking spray, like olive oil or canola oil spray. Rotate them and spray all sides until the breadcrumbs look slightly damp.
Arrange them in a single layer in your air fryer basket, leaving space between each stick for the hot air to circulate.
Air fry for 5 to 6 minutes. Keep a very close eye on them starting at the 4-minute mark. Because air fryers heat food rapidly, the window between perfectly melted and exploded is incredibly small. The moment you see any cheese starting to swell or leak, pull them out.
The Oven Baking Method
Preheat your oven to 450 degrees Fahrenheit (230 degrees Celsius).
Line a baking sheet with parchment paper and place a wire cooling rack on top. Spray the wire rack with non-stick cooking spray.
Place your frozen, oil-sprayed mozzarella sticks onto the wire rack. Baking them on a rack instead of directly on the baking sheet allows the hot oven air to get underneath, preventing them from getting flat and soggy on one side.
Bake for 8 to 10 minutes, keeping a watchful eye on them. Serve immediately.
The Perfect Marinara Sauce Companion
A crispy, salty mozzarella stick is only as good as its dipping sauce. You need something bright, acidic, and slightly sweet to cut through the rich, fatty cheese.
While you can easily buy a jar of store-bought marinara, making a quick, elevated dipping sauce at home takes less than fifteen minutes and makes a world of difference.
Here is my quick go-to recipe. Heat a tablespoon of olive oil in a small saucepan over medium heat. Add two cloves of minced garlic and a pinch of red pepper flakes, cooking until fragrant (about 1 minute).
Pour in one 14-ounce can of crushed San Marzano tomatoes. Add half a teaspoon of dried oregano, a pinch of sugar to balance the acidity, and a generous pinch of salt and pepper.
Let it simmer gently on low heat for 10 to 12 minutes until it thickens up slightly. Finish with a handful of torn fresh basil leaves.
Serve it warm alongside your hot mozzarella sticks. The contrast of the hot, gooey, crunchy cheese with the bright, zesty tomato sauce is absolute perfection.
Troubleshooting Common Mozzarella Stick Disasters
Even with the best instructions, things can go wrong. Let us look at some of the most common issues and how to easily fix them.
The crust is beautiful, but the cheese in the middle is still cold and solid.
This happens when your oil was too hot. The exterior browned and crisped up rapidly, forcing you to pull them out of the oil before the heat had time to penetrate into the center of the frozen cheese.
Make sure you are using a thermometer and keeping the oil steady at 375 degrees Fahrenheit. If this continues to happen, try cutting your cheese sticks into slightly thinner strips next time.
The breading fell off completely during frying.
This is usually a result of improper flouring or skipping the second egg wash dip.
When you do your first flour dredge, you must shake off the excess. If there is a thick, cakey layer of flour on the cheese, the egg wash will bond to the flour, but the flour will slide right off the cheese when heated.
Additionally, make sure you are pressing the breadcrumbs firmly into the cheese stick during both breading rounds to ensure they are physically locked into the egg matrix.
My cheese sticks look flat and misshapen instead of round.
If your sticks look like squashed planks, they likely sat on the counter for too long before frying, allowing the frozen cheese to soften and slump under its own weight.
Always keep them completely frozen until the absolute millisecond they hit the hot oil. Additionally, make sure you gently roll them between your hands after the final breading step to mold them into nice, neat cylinders.
Creative Variations to Try
Once you have mastered the classic Italian-style mozzarella stick, you can start experimenting with different flavors and cheese varieties.
The Pepper Jack Kick
If you want a bit of heat, swap out the plain mozzarella string cheese for Pepper Jack cheese sticks.
Add a pinch of cayenne pepper, smoked paprika, and ground cumin to your flour dredge, and use crushed tortilla chips instead of Panko breadcrumbs for an incredible Tex-Mex twist. Serve these with a side of warm salsa or a creamy avocado ranch dip.
The Cheddar and Beer Batter Twist
For a completely different texture, try using sharp cheddar cheese sticks.
Instead of a traditional breadcrumb coating, you can dip them in a thick, cold beer batter made with flour, cornstarch, baking powder, your favorite pale ale, and a pinch of Old Bay seasoning.
Because beer batter is wet, you must freeze the cheddar sticks solid first, dip them in flour, then dip them in the batter and drop them directly into 375-degree oil. The result is a puffy, airy, pub-style cheese stick that is absolutely addictive.
Making Ahead and Freezing for Future Cravings
One of the greatest things about this recipe is how incredibly well it scales up. When I make these, I rarely make just twelve. I will easily double or triple the recipe and do a massive prep session.
After you have completed the double-breading process and frozen the sticks on the baking sheet for two hours, they will be hard as rocks.
At this point, you can transfer them from the baking sheet into a heavy-duty freezer zip-top bag. Because they are already individually frozen, they will not stick together in the bag.
You can keep these in your freezer for up to three months. Anytime you have friends over, or simply want a quick snack, you can pull out exactly as many as you need and fry them up in under two minutes.
It is incredibly convenient, tastes a million times better than any store-bought frozen brand, and is significantly cheaper than ordering them at a restaurant.
Final Thoughts on Homemade Cheese Sticks
Making mozzarella sticks at home is a true labor of love. It is messy, it requires patience, and it leaves you with a kitchen counter dusted in flour and stray breadcrumbs.
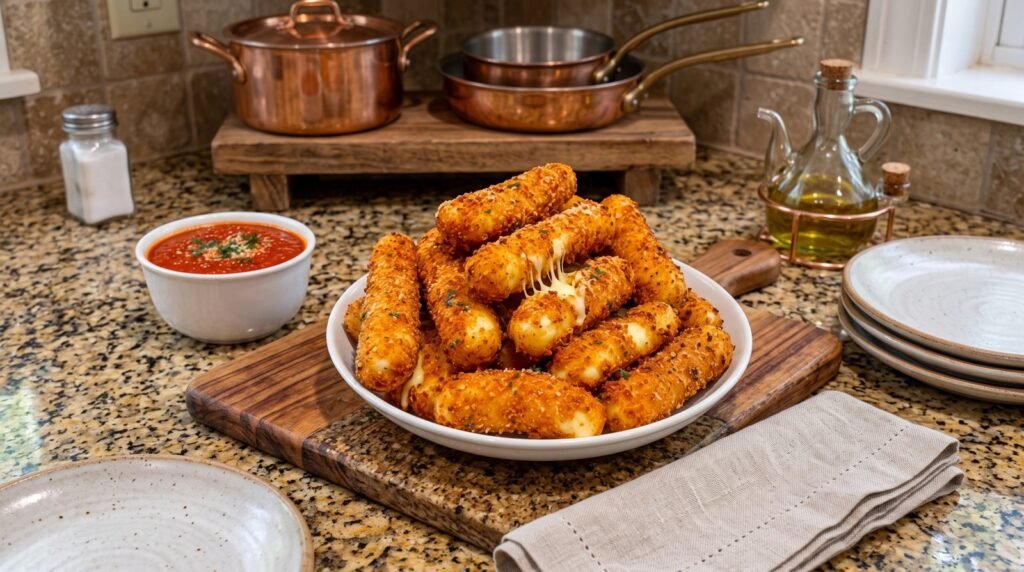
But the moment you pull apart that first golden-brown, shattering-crisp stick, and watch that beautiful, hot cheese stretch effortlessly without breaking, you will realize that every single step was entirely worth it.
Turn on some good music, prep your assembly line, keep that freezer cold, and enjoy the ultimate homemade comfort food. Your friends and family will thank you!