
It was a cold, miserable Tuesday evening when the inspiration for this recipe hit me. My family was sitting around the kitchen island, staring at me with those hungry, expectant eyes that every home cook knows all too well. I had a pack of ground beef in the fridge, but the mere mention of standard meatloaf was met with audible groans from my kids. They wanted cheeseburgers. I wanted something comforting, warm, and easy to throw into the oven so I could sit down for thirty minutes without standing over a smoky stovetop flipping individual patties.
That is when I asked myself a life-changing culinary question: why can we not combine the rich, smoky, cheese-stuffed satisfaction of a diner-style double bacon cheeseburger with the rustic, sliceable comfort of a classic family meatloaf?
My first attempt at this mashup was, quite frankly, an absolute disaster. I made the classic rookie mistake of treating the meatloaf just like a giant hamburger patty. I stuffed a whole block of cheap cheddar in the middle, wrapped the outside in raw bacon, and shoved it into a standard metal loaf pan. An hour later, I pulled out a gray, sad block of meat swimming in a literal lake of grease. The bacon on the sides was rubbery and pale, the cheese had exploded out of the center and burned to the bottom of the pan, and the inside of the loaf was dry enough to choke on.
I almost gave up on the concept entirely. But my stubborn food blogger heart refused to let the dream die. I spent the next three weeks testing different meat-to-fat ratios, experimenting with binders, altering the bacon cooking method, and testing various cheese delivery systems. After seven rounds of testing, I finally cracked the code.
Today, I am sharing the exact, perfected recipe for the ultimate bacon cheeseburger meatloaf. This is not the dry, ketchup-topped brick your grandmother used to make. This is a rich, juicy, cheese-blanketed, bacon-crowned masterpiece that will make your family actually beg for meatloaf night.
The Secret to a Meatloaf That Never Dries Out
Before we jump into the kitchen, we need to talk about food science for just a quick minute. The biggest complaint people have about meatloaf is that it turns out dry and dense. To understand why this happens, you have to understand what happens to ground meat when it cooks. As ground beef heats up, the proteins contract and squeeze out moisture. If you do not have a proper binder and moisture-retaining agent, all that delicious juice ends up at the bottom of your pan instead of inside your slice of meatloaf.
The first secret weapon is a panade. A panade is a simple mixture of starch and liquid mashed into a paste. While many old-school recipes call for dry breadcrumbs thrown straight into the bowl, dry breadcrumbs actually suck moisture away from the meat. Instead, we are going to use crushed buttery crackers mixed with whole milk. When these crackers absorb the milk, they form a gel-like paste that coats the meat fibers, preventing them from locking together tightly. This keeps the finished loaf incredibly tender.
The second secret is the fat ratio. Do not try to make this recipe with ninety percent lean ground beef. It will taste like cardboard. You need eighty-five percent lean beef, or even an eighty-twenty blend. That fat is what carries the beefy flavor and keeps the interior luscious. If you want to take it a step further, you can do what I do on special occasions: use a mix of seventy percent ground beef and thirty percent ground pork. The pork adds a beautiful, subtle sweetness and a tender texture that beef alone cannot replicate.
The third secret is how we handle the onions. Never, under any circumstances, throw raw chopped onions directly into your raw meat mixture. Raw onions release too much water as they bake, creating pockets of steam that make your meatloaf crumbly and watery. Plus, they stay slightly crunchy, which is a terrible texture contrast in a soft loaf. Instead, we are going to finely mince our onions and sauté them in butter until they are soft, translucent, and sweet. This concentrates their flavor and ensures they melt seamlessly into the meat.
Ingredients for the Masterpiece
Let us look at what you need to gather on your counter before we start cooking. Having everything prepped and measured beforehand is the absolute best way to ensure a stress-free cooking experience.
| Ingredient | Amount | Notes |
|---|---|---|
| Ground Beef (85/15 blend) | 2 pounds | Fresh, not previously frozen if possible |
| Thick-Cut Bacon | 10 slices | Cooked crisp and roughly chopped |
| Sharp Cheddar Cheese | 2 cups | Shredded freshly from a block |
| Buttery Crackers (like Ritz) | 1 sleeve | Finely crushed into crumbs |
| Whole Milk | 1/2 cup | Do not use skim or water |
| Yellow Onion | 1 medium | Finely minced |
| Garlic Cloves | 3 cloves | Minced or pressed |
| Salted Butter | 1 tablespoon | For sautéing the aromatics |
| Eggs | 2 large | Beaten to bind everything together |
| Worcestershire Sauce | 2 tablespoons | The ultimate umami booster |
| Yellow Mustard | 1 tablespoon | Adds that classic burger tang |
| Ketchup | 1/2 cup | Divided for the mix and the glaze |
| Brown Sugar | 2 tablespoons | For the sweet and savory glaze |
| Apple Cider Vinegar | 1 tablespoon | Cuts through the richness |
| Salt | 1.5 teaspoons | Fine sea salt or kosher salt |
| Black Pepper | 1 teaspoon | Freshly cracked is best |
Why Freshly Grated Cheese is Non-Negotiable
You might look at the ingredients table and think you can save five minutes by buying a bag of pre-shredded cheddar cheese. Please, I beg of you, do not do it.
Pre-shredded cheese is coated in cellulose powder, potato starch, and natamycin. These additives are dust-like substances designed to prevent the cheese shreds from sticking together in the bag. Unfortunately, they also prevent the cheese from melting together smoothly. If you use bagged cheese, your melted cheese layer will turn out grainy, greasy, and stiff.
When you grate your own cheese from a block of high-quality sharp cheddar, it melts into a glorious, gooey, cohesive blanket that stretches perfectly with every single bite. Grab your box grater, put on some music, and spend those three minutes grating the cheese yourself. Your tastebuds will thank you.
Step-by-Step Instructions
Now that we have our ingredients prepped, let us walk through the cooking process together. I like to break this down into clear, manageable steps so you do not feel rushed at any point.
Step 1: Prep the Aromatics
Start by placing a small skillet over medium heat and melting your tablespoon of butter. Once the butter is bubbling, throw in your finely minced yellow onion. Sauté the onion for about five to six minutes, stirring occasionally, until it turns translucent and soft.
In the last sixty seconds of cooking, add your minced garlic to the skillet. Cook the garlic just until it becomes incredibly fragrant. Be very careful here; garlic burns incredibly fast, and burned garlic will leave a bitter, unpleasant taste throughout your entire meatloaf. Remove the skillet from the heat and set it aside to cool slightly.
Step 2: Build the Panade and Wet Base
In a very large mixing bowl, combine your crushed buttery crackers and your whole milk. Use a fork to stir them together until the crackers have fully absorbed the milk and formed a thick, paste-like mixture.
To this paste, add your beaten eggs, Worcestershire sauce, yellow mustard, two tablespoons of the ketchup, salt, black pepper, and your cooked, cooled onion and garlic mixture. Stir all of these wet ingredients together until they form a smooth, uniform base.
By mixing your seasonings, binders, and aromatics into the wet base first, you ensure that all the flavors are evenly distributed. If you throw raw meat, dry crackers, eggs, and spices all into a bowl together and try to mix them, you will end up with pockets of intense salt or dense, unseasoned meat.
Step 3: Integrate the Meat Gently
Add your two pounds of ground beef to the large bowl containing your wet seasoning mixture. Now, put down your wooden spoon or spatula. The only way to mix meatloaf properly is with your hands.
Using your hands, gently fold the meat into the wet mixture. You want to use a light, lifting-and-folding motion, almost like you are folding egg whites into a cake batter. Do not squeeze, mash, or knead the meat through your fingers like playdough.
Overworking the meat is the number one cause of tough, rubbery meatloaf. When you overwork ground beef, you develop the proteins into a tight, elastic web that bakes up dense and heavy. Mix the meat just until the cracker mixture is visibly integrated throughout, then stop immediately.
Step 4: Shape the Loaf Without a Loaf Pan
This is perhaps the biggest lesson I learned during my trial-and-error phase: do not bake your meatloaf inside a standard metal loaf pan.
When you use a loaf pan, the meatloaf essentially steams in its own rendered fat and juices. You get no browning on the sides, and the bottom becomes soggy and wet.
Instead, line a large, rimmed baking sheet with aluminum foil for easy cleanup, then place a sheet of parchment paper over the foil. Turn your meat mixture out onto the center of the parchment paper. Using your hands, gently shape the meat into a uniform rectangle about nine inches long, five inches wide, and two and a half inches thick.
Try to make the top of the loaf flat rather than highly domed. A flat top gives you a much better surface for holding onto the glorious cheese and bacon layers we are going to add later on.
Step 5: The First Bake
Pop your shaped meatloaf into an oven preheated to 375 degrees Fahrenheit. Bake it undisturbed for exactly forty minutes.
During this initial bake, the exterior of the meatloaf will begin to brown, forming a lovely crust, and the interior will cook most of the way through. You will notice some fat rendering out onto the parchment paper; this is completely normal and exactly what we want.
Step 6: Make and Apply the Glaze
While the meatloaf is enjoying its first round in the oven, whip up your quick burger-style glaze. In a small bowl, whisk together the remaining ketchup, the brown sugar, and the apple cider vinegar. This mixture should be thick, glossy, sweet, and wonderfully tangy.
After the forty-minute mark, carefully pull the meatloaf out of the oven. Use a pastry brush or the back of a spoon to spread this glaze generously over the top and down the sides of the hot meatloaf. Return the glazed meatloaf to the oven for another ten minutes. The heat will cause the sugars in the glaze to caramelize, creating a sticky, deeply flavorful shell that locks in the juices.
Step 7: The Cheese and Bacon Crown
Now comes the part of the recipe that elevates this from a humble dinner to an absolute household legend.
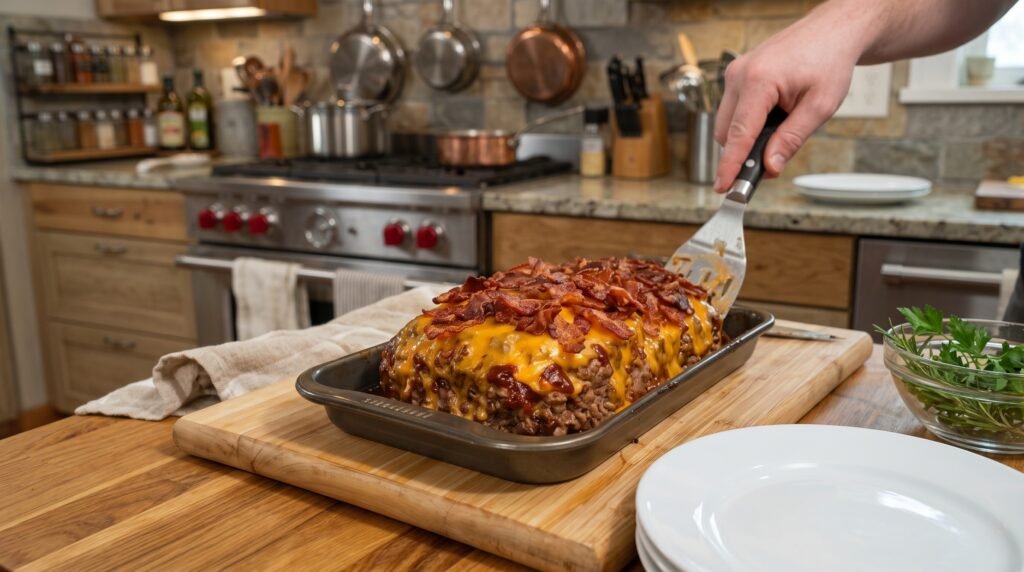
Pull the glazed meatloaf out of the oven once more. Quickly scatter your two cups of freshly grated sharp cheddar cheese in an even, thick blanket over the flat top of the loaf.
Immediately cover the cheese with your pre-cooked, crispy, chopped bacon. Press down very gently with your fingers or a spatula so the bacon sinks slightly into the cheese, ensuring it stays anchored in place.
Return the loaf to the oven for a final five to seven minutes. Keep a close eye on it during this stage. You want the cheddar cheese to be completely melted, bubbling, and slightly draped down the sides of the meatloaf, but you do not want it to burn or separate into oil.
Step 8: The Power of the Rest
When you pull that bubbling, cheesy, bacon-covered masterpiece out of the oven, your kitchen is going to smell like heaven. Every instinct in your body will tell you to slice into it immediately.
You must resist this temptation.
If you cut into the meatloaf right now, all those bubbling hot juices will instantly rush out of the meat and pool on your cutting board, leaving you with dry slices.
Instead, let the meatloaf rest on the baking sheet for a solid ten to fifteen minutes. During this resting period, the muscle fibers in the meat will relax, allowing them to reabsorb all those delicious juices. The melted cheese will also set up just enough so that it clings to the meat when sliced, rather than sliding off onto your platter.
Common Mistakes to Avoid
Even with a foolproof recipe, a few little missteps can derail your dinner. Here are the most common blunders I made over my three weeks of testing, so you can avoid them entirely.
- Using raw bacon on top of the loaf: Many recipes tell you to drape raw bacon strips over the uncooked meatloaf before putting it in the oven. Do not do this. Because the bacon is surrounded by steam and grease from the beef, the underside of the bacon strips will stay soft, chewy, and slimy. By cooking your bacon to a beautiful crisp beforehand and crumbling it onto the melted cheese at the very end, you guarantee maximum crunch and smoky flavor in every bite.
- Slicing too thin: This is a rich, tender meatloaf, not deli meat. If you try to cut thin, half-inch slices, the structural integrity of the loaf will fail, and your slices will crumble apart. Aim for thick, hearty slices about one to one and a half inches thick. They look incredibly rustic and hold together beautifully.
- Skipping the meat thermometer: Every oven runs slightly differently. The only true way to know if your meatloaf is done without cutting it open and ruining the look is to use an instant-read meat thermometer. Insert the probe into the very center of the thickest part of the loaf. You are looking for a reading of 160 degrees Fahrenheit. Once it hits that mark, it is perfectly safe to eat and spectacularly juicy.
- Using processed cheese singles: It can be tempting to use those wrapped plastic-like American cheese slices because they are a classic burger staple. However, they melt far too quickly in the oven and turn into a runny, liquid mess that slides right off the meatloaf onto your baking sheet. Stick to block cheddar, Monterey Jack, or even Colby Jack for the perfect melt.
How to Serve This Epic Dinner
When you are serving a meal this rich and comforting, you want side dishes that can hold their own.
My absolute favorite pairing for this recipe is a mountain of garlic-parmesan mashed potatoes. The starchy, creamy potatoes act as the perfect canvas for catching any stray drops of cheeseburger glaze.
If you want to keep the burger theme going, you can serve this with thick-cut potato wedges roasted with salt and smoked paprika, alongside a plate of crisp dill pickle spears. The acidity of the pickles cuts through the rich, savory nature of the meat, cleaning your palate between bites.
For a green side dish, I highly recommend roasted asparagus or long green beans tossed with olive oil, garlic, and lemon juice. The bright, fresh flavors of the greens balance out the heavy, comforting elements of the main course beautifully.
The Legendary Next-Day Leftover Sandwich
As amazing as this meatloaf is fresh out of the oven, I have a confession to make: it might actually be even better the next day.
Cold meatloaf firms up beautifully in the refrigerator, making it incredibly easy to handle. If you find yourself with leftovers, you must make a Leftover Meatloaf Patty Melt.
Take a thick slice of cold meatloaf. Heat a teaspoon of butter in a skillet over medium heat and sear the slice for three to four minutes on each side until a deeply caramelized crust forms and the interior is hot.
Butter two slices of sourdough bread or brioche. Place the seared meatloaf slice between the bread, add an extra slice of Swiss or cheddar cheese, and grill the sandwich in your skillet just like a grilled cheese. It is, hands down, one of the greatest culinary experiences you will ever have in your own home.
Frequently Asked Questions
Can I make this recipe gluten-free?
Yes, absolutely. To make this gluten-free, simply swap out the buttery crackers for an equal amount of your favorite gluten-free crackers or gluten-free panko breadcrumbs. Just make sure to crush them finely so they can still absorb the milk to form that essential moisture-retaining paste.
Can I freeze this meatloaf?
Yes, you can freeze this meatloaf either raw or cooked.
To freeze it raw, shape the beef mixture into a loaf on a piece of plastic wrap, wrap it tightly three times to prevent freezer burn, and place it in a freezer-safe bag. It will keep beautifully for up to three months. When you are ready to cook it, let it thaw completely in the refrigerator overnight, then bake it according to the recipe instructions.
To freeze it cooked, let the meatloaf cool completely to room temperature. Slice it into individual portions, wrap each slice in plastic wrap, and freeze them. This is incredibly convenient for quick weekday lunches; you can just pop a single slice into the microwave for two minutes and have a comforting home-cooked meal ready in seconds.
What can I use instead of milk?
If you have a dairy sensitivity or simply ran out of whole milk, you can use beef broth or unsweetened almond milk to create your binder paste. While whole milk is preferred because the natural milk fats tenderize the meat fibers, beef broth still provides excellent moisture and adds a nice, deep savory flavor.
Can I make this in an air fryer?
You actually can! If you have a large basket-style air fryer, you can shape the meatloaf into a slightly rounder, more compact loaf that fits comfortably inside your air fryer basket lined with parchment paper. Cook it at 350 degrees Fahrenheit for about thirty-five to forty minutes, apply your glaze, cheese, and bacon, and cook for another three to five minutes. Just make sure to use your meat thermometer to verify the interior has reached 160 degrees.
Bringing It All Together
Cooking for the people you love should never feel like a chore, and it certainly should not be boring. Sometimes, all it takes to breathe new life into your kitchen routine is looking at a classic, reliable ingredient through a fun, creative lens.
This bacon cheeseburger meatloaf is proof that comfort food does not have to be complicated to be absolutely extraordinary. It brings together the very best parts of two beloved American classics into one simple, family-friendly baking sheet dinner.
The next time you find yourself staring at a package of ground beef on a busy weeknight, step away from the boring burger buns and the dry meatloaf pans. Grab some crackers, grate a block of cheddar, fry up some bacon, and treat your family to a meal they will talk about for weeks to come. Happy cooking!