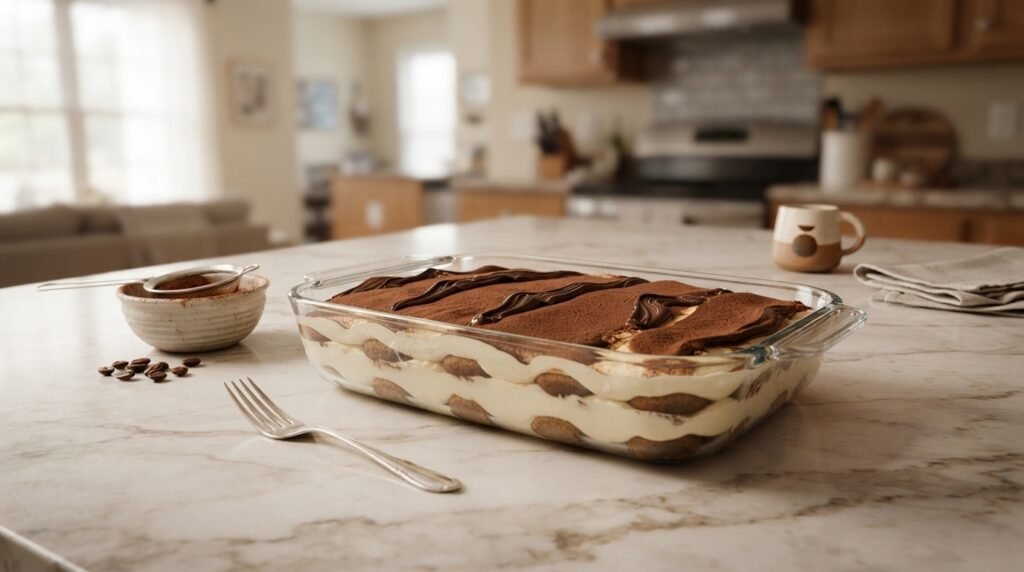

I still remember the first time I attempted to make tiramisu from scratch. I had guest friends coming over for dinner, and I wanted to impress them with something that looked and tasted straight out of a cozy trattoria in Rome. I bought a box of ladyfingers, brewed a big pot of espresso, whipped up some mascarpone cream, and assembled everything with supreme confidence.
Two hours later, when I went to scoop out the first piece, disaster struck. It didn’t slice—it slumped. The bottom layer of ladyfingers had turned into a lukewarm, coffee-soaked sponge cake soup. The cream was running off the sides, and while the taste wasn’t terrible, the texture was a complete nightmare.
It took me three more attempts, a lot of wasted eggs, and advice from an Italian neighbor’s grandmother to realize where I went wrong. Tiramisu looks ridiculously simple—and it actually is—but it’s a dessert governed by a few strict rules of kitchen chemistry and technique.
If you’ve ever had a tiramisu turn into a soupy puddle, or if you’re intimidated by making raw egg zabaglione, this guide is for you. Here is everything I’ve learned from my trial-and-error journey, along with my fail-proof recipe for the absolute best authentic homemade tiramisu.
What Makes a Great Tiramisu?
Before diving into the recipe, let’s break down what actually goes into an incredible tiramisu. True Italian tiramisu relies on a delicate balance between four main elements:
The Ladyfingers (Savoiardi): These aren’t soft sponge cakes; they are hard, dry, sugar-dusted biscuit fingers. They need to absorb liquid quickly without dissolving into paste.
The Espresso Soaking Liquid: Strong, dark espresso (never cheap instant coffee powder dissolved in warm water unless you’re in a pinch) spiked optionally with a dash of dark rum, Marsala wine, or Kahlúa.
The Mascarpone Cream: A rich, velvety blend made from creamed egg yolks, sugar, mascarpone cheese, and folded egg whites or heavy cream for lift.
The Cocoa Powder Top: Unsweetened Dutch-processed cocoa powder dusted generously right before serving to balance the sweetness of the cream and the bitterness of the coffee.
Ingredients You’ll Need
Here is the exact ingredient checklist I use. Make sure your ingredients are top quality—because there is no baking involved, every single ingredient stands out.
For the Coffee Dip:
1 ½ cups (360 ml) freshly brewed espresso or very strong dark roast coffee (cooled to room temperature)
2 tablespoons dark rum, Marsala wine, or Kahlúa (optional, but highly recommended for depth)
1 tablespoon granulated sugar (optional, if you prefer a slightly sweeter coffee taste)
For the Cream Filling:
6 large egg yolks (at room temperature)
¾ cup (150 g) granulated sugar
16 oz (450 g / approx. 2 cups) Italian Mascarpone cheese (slightly softened, not cold)
1 cup (240 ml) cold heavy whipping cream (or 4 large egg whites if making the traditional egg-white version)
1 teaspoon vanilla extract
For Assembly & Topping:
1 package (approx. 200–250g / 24–30 biscuits) Italian Savoiardi ladyfingers (crisp/dry variety)
2–3 tablespoons unsweetened dark cocoa powder (for dusting)
Optional: High-quality dark chocolate block for shaving over top
Step-by-Step Instructions: How to Make It Right
Step 1: Brew and Cool the Coffee
First thing’s first: brew your espresso. If you have an espresso machine or a Moka pot, now is its time to shine. If not, make an ultra-concentrated dark roast in a French press or drip coffee maker.
Mix in the liquor if you are using it, and let the mixture cool completely down to room temperature.
Crucial Lesson: Never dip ladyfingers in hot or warm coffee! Warm coffee makes the biscuits disintegrate almost instantly on contact.
Step 2: Cook the Egg Yolks (The Safe & Smooth Method)
While traditional recipes use raw egg yolks whipped with sugar, I prefer cooking the yolks gently over a double boiler (bain-marie). This eliminates any food safety worries and creates a silky, custard-like base (zabaglione).
Set a heatproof glass bowl over a saucepan with about an inch of simmering water (make sure the bottom of the bowl doesn’t touch the water).
Add the 6 egg yolks and ¾ cup of sugar to the bowl.
Whisk constantly for about 6–8 minutes until the sugar dissolves, the mixture turns pale yellow, and it thickens to a ribbony consistency.
Remove the bowl from heat and let it cool for about 10 minutes, whisking occasionally.
Step 3: Blend in the Mascarpone
Once your egg yolk mixture is warm (not hot), add the softened mascarpone cheese and vanilla extract.
Whisk or mix gently using a spatula until just combined and smooth. Do not overmix! Mascarpone has a high fat content and can split or curdle if beaten too aggressively.
Step 4: Whip the Cream
In a separate clean bowl, whip the 1 cup of cold heavy cream using a hand mixer or stand mixer until stiff peaks form.
Gently fold the whipped cream into the mascarpone-yolk mixture in three batches using a rubber spatula. Use light, sweeping motions—you want to keep as much air in the cream as possible so the tiramisu feels light and airy rather than dense and heavy.
Step 5: The “One-Second Dip” (Where Magic Happens)
Pour your cooled espresso into a shallow wide dish or pie plate.
Take your dry Savoiardi ladyfingers one by one. Briefly submerge each cookie in the coffee—literally one second per side (dip-flip-out).
It will feel like they haven’t absorbed enough coffee, but trust the process. As the dessert sits in the fridge, the ladyfingers will continue to draw moisture from the cream and soften to a cake-like texture without turning into mush.
Step 6: Assemble the Layers
Lay the dipped ladyfingers side-by-side in a single layer at the bottom of an 8×11 inch or 9×13 inch glass baking dish. You can snap biscuits in half to fill any small gaps.
Spread half of the mascarpone cream evenly over the ladyfinger layer using an offset spatula.
Repeat with a second layer of dipped ladyfingers placed right over the cream.
Top with the remaining half of the mascarpone cream, smoothing out the top layer or piping decorative dollops if you want an artisanal look.
Step 7: Chill (Patience is Key!)
Cover the baking dish tightly with plastic wrap and refrigerate for at least 6 hours, though 12 to 24 hours is ideal.
Tiramisu is one of those rare dishes that tastes significantly better on day two because the flavors meld together and the structure sets up firm enough to slice neatly.
Step 8: Dust and Serve
Just before serving, fit a fine-mesh strainer with 2-3 tablespoons of dark cocoa powder and dust it liberally over the top until the white cream is fully covered. If you like, add some freshly shaved dark chocolate over top for extra crunch and richness. Slice, serve, and enjoy!
4 Mistakes That Will Ruin Your Tiramisu (And How to Avoid Them)
Over the years, I’ve made almost every mistake possible with this recipe. Save yourself the heartache by keeping these pitfalls in mind:
1. Using Soft Sponge Cake Ladyfingers
In the bakery aisle, you’ll sometimes find soft, cakey ladyfingers meant for trifles. Avoid these! They act like sponges and instantly dissolve in liquid. Look specifically for Savoiardi—they are hard, crunchy, and dry.
2. Over-Soaking the Biscuits
I can’t stress this enough: do not let the ladyfingers sit in the coffee! It should be a quick dip in and out. If the biscuit feels heavy and soggy in your hand before going into the dish, your tiramisu will end up watery.
3. Using Cold Mascarpone
Taking mascarpone straight from the fridge and dumping it into your egg mixture will result in lumpy, split cream. Take the mascarpone out of the fridge about 20–30 minutes before you start cooking so it softens slightly.
4. Dusting Cocoa Powder Too Early
If you dust the cocoa powder over the top layer before putting the tiramisu into the fridge, the cocoa will absorb moisture from the cream and turn into a dark, muddy paste. Always wait to dust the cocoa powder until right before you bring it to the table.
Frequently Asked Questions
Can I make tiramisu without alcohol?
Absolutely. The alcohol adds warmth and depth, but it is completely optional. You can substitute it with a drop of rum extract, or simply leave it out entirely and let the rich espresso flavor take center stage.
How long does homemade tiramisu last in the fridge?
Stored covered in the refrigerator, tiramisu stays fresh and delicious for up to 4 to 5 days. In fact, many people prefer it on day two or three when the coffee and cream flavors have completely harmonized.
Can I freeze tiramisu?
Yes! Tiramisu freezes surprisingly well. Assemble the dish completely (without dusting the cocoa powder on top), wrap it tightly in a double layer of plastic wrap and aluminum foil, and freeze for up to 3 months. Thaw it in the refrigerator overnight before dusting with cocoa powder and serving.
Final Thoughts
There’s a reason tiramisu translates literally to “pick me up.” With its bold espresso kick, creamy mascarpone balance, and light chocolate finish, it’s arguably one of the most comforting desserts ever created.
Don’t be intimidated by the process. As long as you keep your coffee cool, treat your ladyfingers to a brief dip, and give the dish enough time to rest in the fridge, you’ll produce a restaurant-quality tiramisu that will have everyone asking for seconds.
Give this recipe a shot this weekend, and let me know in the comments below how your layers turned out! Happy baking (or rather, non-baking)!