
The No-Bake Halloween Cookie I Wish I Had Known About Years Ago
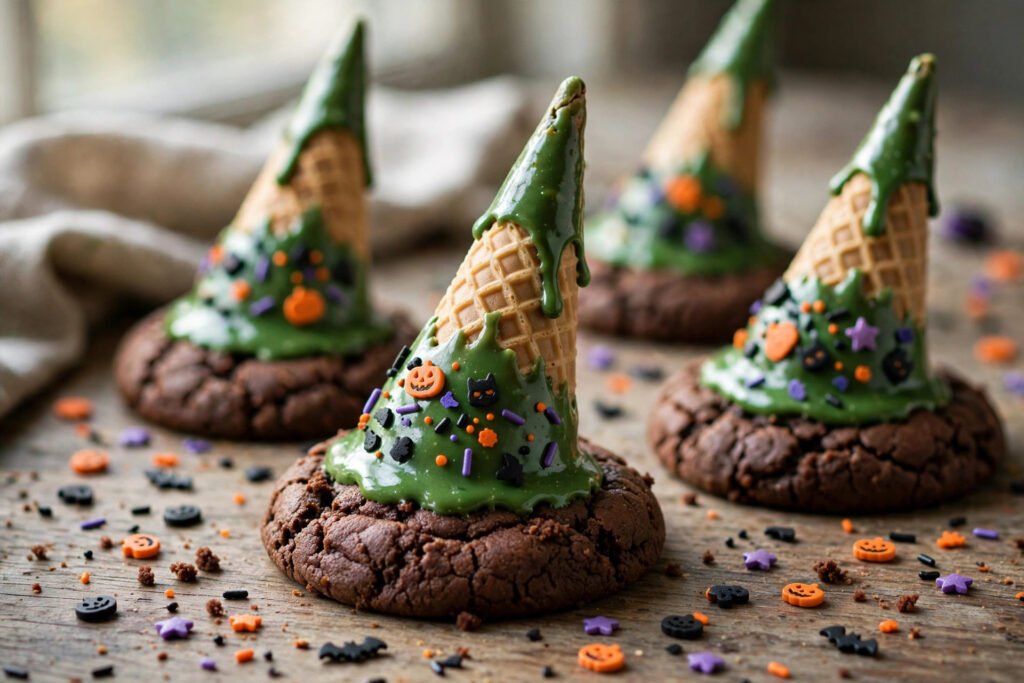
There is a special category of Halloween treat that I call “looks like you spent all day, took twenty minutes,” and these witch hat cookies are its finest member. Fudge cookie bases, waffle-cone hats dipped in glossy green candy melts, a dab of chocolate peanut butter to hold it all together, and a snowfall of Halloween sprinkles. The first time I set a plate of these out, a grown adult asked me where I had ordered them from, and I have never felt so smug about something that required absolutely no baking.
The genius of this recipe is that it is pure assembly. The cookies, the cones and the candy melts do all the heavy lifting, and your job is the fun part: dipping, decorating, and trying not to eat the hats before they make it onto the plate. They look like something from a professional bakery case — those glossy green peaks are absurdly photogenic — and they taste like the best kind of Halloween sugar rush. If you can stir a pot and hold a cone steady, you can make these, and you will look like a Halloween hero doing it.
Why You’ll Love This Recipe
- No baking required. The oven never even turns on — this is pure assembly.
- Twenty minutes, start to finish. Plus a little setting time, which you barely notice.
- Adorable and photogenic. Those green candy hats are made for the party table.
- Kid-friendly to make. Little hands can dip, sprinkle and stick to their hearts’ content.
- A proven crowd-pleaser. I have never brought these anywhere and brought any home.
Ingredients
Makes 16 witch hat cookies
For the hats:
- 16 sugar or waffle cones (the small pointed kind, about 7 to 8cm tall)
- 200g green candy melts
- 1 tablespoon butter or coconut oil (to thin the melts)
For the bases and assembly:
- 16 fudge-striped or plain chocolate fudge cookies
- 60g chocolate chips, melted
- 2 tablespoons smooth peanut butter
- Halloween sprinkles, as much as you dare
Instructions
- Step 1 — Prep your station. Line a baking tray with parchment paper. Set out the cookies flat-side up, the cones, the sprinkles and everything else — once the candy melts are liquid, you will want to move quickly.
- Step 2 — Melt the candy melts. Place the green candy melts in a heatproof bowl with the butter and melt them in short 20-second bursts in the microwave, stirring between each, until completely smooth and glossy. Alternatively, melt them gently in a bowl over simmering water.
- Step 3 — Dip the cone hats. Holding each cone by its rim, dip it into the melted candy until it is fully coated, letting the excess drip off for a moment. While the coating is still wet, shower it with Halloween sprinkles over the parchment tray. Stand each finished hat upright to set.
- Step 4 — Make the “glue”. Stir the melted chocolate chips together with the peanut butter until you have a thick, glossy chocolate-peanut butter paste. This is what anchors each hat to its cookie base.
- Step 5 — Assemble the hats. Dab a generous teaspoon of the chocolate-peanut butter mixture into the centre of each fudge cookie, then press a candy-coated cone firmly onto it, rim-side down, so it sits like a proper witch’s hat.
- Step 6 — Let them set. Leave the assembled cookies undisturbed for 20 to 30 minutes at room temperature (or 10 minutes in the fridge) until the candy coating and the chocolate glue are fully firm.
- Step 7 — Plate and serve. Arrange the witch hats on a platter or cake stand, tall and proud. Serve at room temperature so the cookie bases stay crisp and the hats stay snappy.
Tips for Success
- Work in batches when melting the candy melts — melt half first, dip half the cones, then melt the rest. Candy melts set quickly and re-melting can make them grainy.
- If the candy coating thickens while you work, stir in another teaspoon of butter or coconut oil and warm it briefly. Do not add water — water makes candy melts seize.
- Decorate the hats over the parchment tray so stray sprinkles land where you can sweep them back into the bowl.
- Press the cones onto the cookies firmly but not so hard that the cookie cracks — fudge cookies are sturdy, but they have limits.
- A cool kitchen is your friend. If your house is warm, set the finished hats in the fridge for 10 minutes to speed up the setting.
Serving Ideas
- On a tiered stand as the centrepiece of a Halloween dessert table.
- Tucked into cellophane bags tied with orange ribbon as party favours.
- Alongside hot chocolate or warm apple cider at a spooky movie night.
- In lunchboxes the week before Halloween as a surprise treat.
- As a no-bake activity with the kids on a rainy October afternoon — the decorating is the best part.
FAQs
Can I use a different colour for the hats?
Yes — purple, orange or classic black candy melts all look fantastic. Green is the traditional witch-hat colour, but I have seen gorgeous purple-hatted versions and they steal the show.
Do the cones go stale?
Once dipped and set, the candy coating seals the cone and keeps it crisp for days. Just keep the finished cookies in an airtight container at room temperature.
Can I skip the peanut butter?
You can — melted chocolate on its own will hold the hats in place. The peanut butter adds flavour and a little flexibility so the join is less brittle, but plain melted chocolate chips work fine, especially for nut allergies.
How far ahead can I make these?
They keep beautifully for up to 5 days in an airtight container at room temperature. In fact, I often make them the day before a party so the pressure is off.
What if I cannot find green candy melts?
White candy melts tinted with green oil-based food colouring work well — just make sure it is oil-based, because water-based colouring will seize the melts. Or simply choose another spooky colour.