
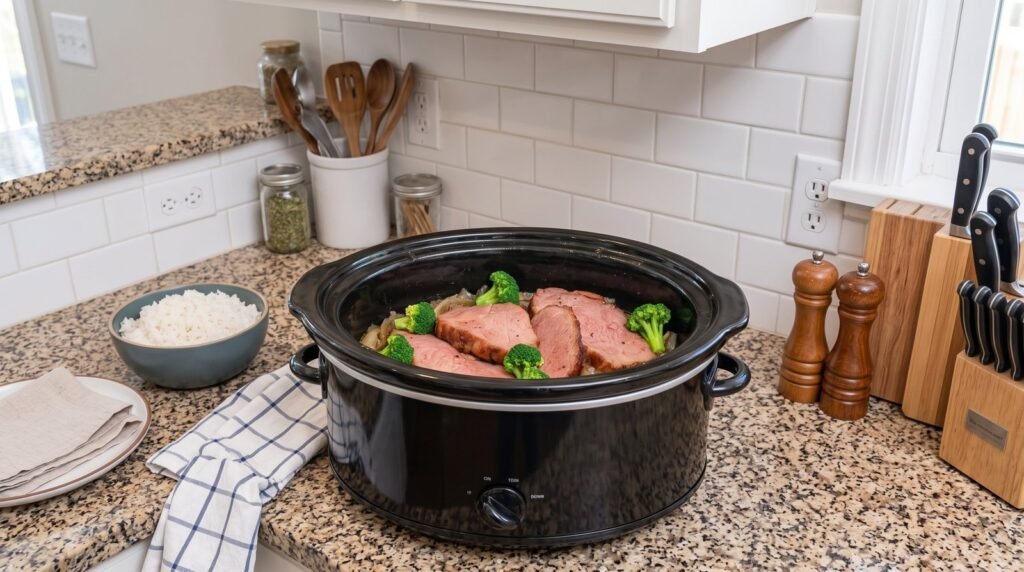

We need to have an honest conversation about the great slow cooker myth. For years, food bloggers and recipe books have told us that we can throw any piece of meat into a crockpot, turn it on low for eight to ten hours, and magically end up with a five-star meal. I fell for this promise for a very long time. I would head off to work, dreaming about the tender, juicy roast waiting for me at home. But instead of a culinary masterpiece, I would walk through the door to a house that smelled incredible, only to find a dry, stringy, grey piece of meat sitting in a pool of greasy liquid. It was always a massive disappointment, and for a long time, I blamed myself or my slow cooker.
After ruining more Sunday dinners than I care to admit, I finally decided to look at the science of what was actually happening inside that ceramic pot. Slow cookers are fantastic tools, but they are not magic boxes that defy the laws of physics and meat chemistry. If you want beautiful, clean, tender slices of beef with a juicy, rosy-pink center, you cannot treat your meat like a dump-and-go meal. You need a deliberate strategy, the right cut of beef, a protective cooking barrier, and precise temperature control.
That is where this French onion beef roast comes in. This recipe was born out of sheer kitchen frustration and a deep, obsessive love for traditional French onion soup. I wanted a roast that was elegant enough to slice and serve to guests, not shredded into mush. I wanted every bite to be infused with the sweet, savory, deeply rich flavor of caramelized onions and rich beef broth. After weeks of testing, adjusting cook times, and experimenting with different cuts of meat, I finally perfected the method. I am so excited to share every tip, trick, and lesson I learned along the way so you can skip the trial and error and get a perfect result on your very first try.
The Science of Meat: Collagen versus Lean Muscle
To understand why this recipe works, we have to look at the two main categories of beef roasts you find at the grocery store. Understanding this distinction will completely change how you use your slow cooker for the rest of your life.
On one side, you have collagen-rich cuts like chuck roast, brisket, and beef shanks. These cuts come from parts of the animal that do a lot of work, meaning they are packed with tough connective tissue. To make these cuts palatable, you must cook them low and slow for a long time. Over eight to ten hours, that tough collagen slowly breaks down into rich, silky gelatin. This is why a chuck roast shreds so beautifully and tastes so moist, even though it has been cooked past well-done. If you try to slice a chuck roast, it will simply crumble into individual muscle fibers.
On the other side, you have leaner, muscular cuts like eye of round, top round, bottom round, and sirloin tip. These cuts are much lower in fat and connective tissue. If you cook a lean sirloin tip roast for eight hours in a slow cooker, all of the moisture will squeeze out of the muscle fibers, and with no collagen to turn into gelatin, you will be left with a dry, chalky disaster. To keep these leaner cuts tender and juicy, we must treat them more like a steak. We want to cook them to a precise medium-rare or medium temperature, allow them to rest, and then slice them thinly against the grain.
For this recipe, we are using a sirloin tip roast or an eye of round roast. These cuts are affordable, easy to find, and hold their shape beautifully when sliced. By using a shorter cooking window and keeping a close eye on the internal temperature, we get the best of both worlds: the convenience of the slow cooker and the juicy elegance of a perfectly roasted piece of beef.
Why the Onion Bed is Your Secret Weapon
One of the biggest challenges of cooking a lean roast in a slow cooker is the direct heat from the bottom of the ceramic insert. The heating elements in most slow cookers are located in the base and wrap around the lower sides. If you place a lean piece of beef directly on the bottom of the pot, that contact surface will overcook and scorch long before the center of the meat reaches your target temperature.
The solution is to build a thick, natural cooking trivet using sliced onions. By tossing a generous amount of thickly sliced onions in butter, garlic, and seasonings, and laying them evenly across the bottom of the slow cooker, you create a protective barrier for the beef.
As the slow cooker heats up, the onions gently steam and release their sweet, flavorful juices. The roast sits safely on top of this bed, cooking evenly from the ambient heat inside the pot rather than the harsh, direct heat of the ceramic bottom. By the time the beef is perfectly cooked, the onions have softened, absorbed the rich drippings from the meat, and transformed into a luxurious, sweet, and savory French onion mixture that serves as the ultimate topping and gravy base.
The Magic of Caramelization in a Slow Cooker
True caramelized onions take time, patience, and direct heat. If you simply throw raw onions into a slow cooker with some beef broth, they will cook, but they will taste boiled and sweet rather than rich and caramelized. To get that deep, classic French onion soup flavor profile, we have to use a couple of clever kitchen workarounds.
First, we slice our onions thickly. I prefer cutting them into half-inch half-moons from pole to pole, rather than across the equator. Cutting onions pole to pole helps them retain their structural integrity during the braising process, preventing them from dissolving into complete mush.
Second, we pre-treat the onions. Before they go into the slow cooker, we toss them in a mixture of melted butter, a touch of brown sugar, minced garlic, and a splash of Worcestershire sauce. The sugar and Worcestershire sauce mimic the deep, caramelized notes of long-roasted onions, while the butter adds that essential French bistro richness. When the juices from the browning beef drip down onto these seasoned onions, a magical flavor fusion occurs that tastes like it took all day to develop.
Why You Absolutely Need a Digital Probe Thermometer
If you take only one piece of advice from this entire guide, let it be this: invest in a digital leave-in probe thermometer. You can find them online or at most grocery stores for a very reasonable price, and they will completely revolutionize your cooking.
Every slow cooker is different. Some older models cook at a true simmer, while newer models tend to run much hotter to meet modern food safety guidelines. Furthermore, the size, shape, and starting temperature of your beef roast will vary every time you make this dish. Because of these variables, relying purely on a clock to tell you when your meat is done is a recipe for disappointment.
A digital probe thermometer features a stainless-steel probe attached to a long, heat-resistant wire. You insert the probe into the very center of the thickest part of your roast, place the roast in the slow cooker, and run the wire out under the lid to a digital display sitting on your counter. You can set an alarm to sound the exact second your beef reaches your desired temperature. This eliminates all guesswork, preventing you from opening the lid and releasing valuable heat, and guarantees a perfect pink center every single time.
Ingredients for the Perfect French Onion Roast
Before we get to the step-by-step process, let us look at the ingredients you will need. Each of these components plays a vital role in building the deep, complex flavors of this dish.
| Ingredient | Quantity | Purpose |
|---|---|---|
| Beef sirloin tip or eye of round roast | 3 to 4 pounds | Lean, flavorful cut that slices beautifully when cooked to medium-rare |
| Yellow onions | 3 large | Sliced thickly to create a flavorful protective cooking bed |
| Olive oil | 2 tablespoons | High-smoke-point oil used to get a deep sear on the beef |
| Butter | 2 tablespoons | Melted to coat the onions and add classic French richness |
| Beef broth | 1 cup | High-quality broth to create the savory gravy base |
| Worcestershire sauce | 2 tablespoons | Adds a deep, savory umami depth to the onions and gravy |
| Garlic | 4 cloves | Freshly minced to infuse the dish with aromatic flavor |
| Brown sugar | 1 teaspoon | Promotes caramelization and balances the savory elements |
| Dried thyme | 1 teaspoon | Classic herb that pairs perfectly with beef and onions |
| Bay leaf | 1 whole | Adds a subtle, herbal complexity to the braising liquid |
| Salt and black pepper | To taste | Essential for seasoning the meat and building layers of flavor |
| Cornstarch | 1 tablespoon | Optional, mixed with cold water to thicken the natural juices into gravy |
The Golden Rules of Preparation: Seasoning and Searing
Now that we have our ingredients gathered, let us discuss the preparation steps that turn a good roast into an unforgettable one.
First, let us talk about seasoning. Lean roasts need plenty of salt. If you have the time, I highly recommend dry brining your beef. To do this, season your roast generously with salt on all sides the night before you plan to cook it. Place it on a wire rack set inside a baking sheet and leave it uncovered in your refrigerator overnight.
As the meat sits, the salt draws out moisture, dissolves, and is reabsorbed deep into the muscle fibers, seasoning the meat from the inside out. The cold air of the refrigerator also dries out the surface of the beef, which is the secret key to getting a restaurant-quality sear. If you do not have time for an overnight dry brine, do not worry. Simply season the roast generously with salt, pepper, and dried thyme about thirty minutes before cooking, letting it sit on your counter to take the chill off.
Next is the sear. I know it is tempting to skip this step, especially on a busy morning when you just want to get things into the pot. But please, do not skip the sear. Searing does not lock in juices, which is another common kitchen myth, but it does trigger the Maillard reaction. This chemical reaction between amino acids and reducing sugars creates hundreds of deep, complex flavor compounds that you simply cannot get from slow cooking alone.
To sear properly, heat your olive oil in a heavy-bottomed skillet, preferably cast iron, over medium-high heat until it is shimmering and just starting to smoke. Place the seasoned roast in the pan and leave it alone for two to three minutes until a deep, golden-brown crust forms. Rotate the roast and repeat until all sides, including the ends, are beautifully seared. This step only takes about ten minutes, but it makes an immeasurable difference in the final depth of flavor of both the meat and the gravy.
Step-by-Step Cooking Guide
With our prep complete, we are ready to assemble and cook our roast. Follow these steps carefully for a flawless dinner.
First, prepare your onion bed. In a medium bowl, combine your thickly sliced yellow onions, melted butter, minced garlic, brown sugar, and one tablespoon of Worcestershire sauce. Toss everything together until the onions are evenly coated. Spread this mixture in a uniform layer across the bottom of your slow cooker insert.
Next, place your seared beef roast directly on top of the onions. If your roast has a fat cap (a layer of white fat on one side), make sure to place the roast fat-side up. As the fat melts during the cooking process, it will naturally baste the meat, keeping it moist and flavorful.
Now, we need to capture all the incredible flavor left behind in our searing skillet. Do not let those browned bits at the bottom of the pan, known as fond, go to waste. Turn the heat under your skillet down to medium and pour in your beef broth and the remaining tablespoon of Worcestershire sauce. Use a wooden spoon to scrape up all the browned bits from the bottom of the pan as the liquid simmers. Once the skillet is clean and the liquid is hot, pour it carefully into the slow cooker.
When pouring the liquid into the slow cooker, pour it around the sides of the roast, not directly over the top. If you pour it over the beef, you will wash away that beautiful seasoned crust we just worked so hard to create. Drop your bay leaf into the liquid alongside the onions.
Insert your digital thermometer probe into the thickest part of the roast, making sure the tip of the probe is not resting against a bone or a pocket of fat, as this will give you an inaccurate reading. Put the lid on the slow cooker, running the probe wire out carefully under the lid.
Set your slow cooker to LOW. Let me reiterate: do not cook this roast on high. Lean cuts of beef must be cooked gently. High heat will cause the muscle fibers to seize up and squeeze out all their moisture, resulting in tough, dry meat.
Set your thermometer alert to 130 degrees Fahrenheit for a perfect medium-rare, or 135 degrees Fahrenheit for a juicy medium. Depending on your slow cooker and the size of your roast, this will typically take between three and four and a half hours.
Once the alarm sounds, immediately turn off the slow cooker. Carefully transfer the roast to a clean cutting board. Tent the roast loosely with a piece of aluminum foil and let it rest for fifteen to twenty minutes.
Resting the meat is absolutely non-negotiable. While cooking, the muscle fibers tighten and push the meat juices toward the center of the roast. If you slice into the beef immediately after removing it from the heat, all of those delicious juices will run out onto your cutting board, leaving your meat dry. During the resting period, the muscle fibers relax, allowing the juices to redistribute evenly throughout the entire roast. This ensures that every single slice is incredibly tender, juicy, and flavorful.
Crafting the Ultimate French Onion Gravy
While your beef is resting, you have the perfect opportunity to transform the juices left behind in the slow cooker into a rich, velvety French onion gravy.
Discard the bay leaf from the pot. At this point, you will have a generous amount of liquid and a pile of beautifully softened, sweet onions. If you prefer a rustic, thin au jus, you can serve the juices exactly as they are. However, if you want a luscious gravy that clings beautifully to the meat and mashed potatoes, you can easily thicken it.
Turn your slow cooker to the HIGH setting. In a small cup, whisk together one tablespoon of cornstarch with one tablespoon of cold water until smooth to create a slurry. Pour this slurry into the simmering juices in the slow cooker, stirring constantly to combine.
Let the mixture bubble on high for about ten minutes, stirring occasionally, until the gravy has thickened to your liking. Taste the gravy and adjust the seasoning with an extra pinch of salt, black pepper, or a splash of Worcestershire sauce if needed.
How to Carve Your Roast Like a Professional Chef
You have selected the right cut, seared it beautifully, cooked it to the exact degree of doneness, and rested it patiently. The final step to ensuring a meltingly tender texture is carving the meat correctly.
Always slice your beef against the grain. If you look closely at your roast, you will see the muscle fibers running parallel to each other like lines on a piece of wood. This is the grain. If you slice parallel to these lines, you are leaving long, intact muscle fibers in each piece, which will make the meat chewy and difficult to eat.
By cutting perpendicular to those lines, you are cutting those long muscle fibers into tiny, short pieces. This completely removes the chewiness and ensures that the meat is so tender it practically melts in your mouth. Use a very sharp carving knife or a long bread knife, and aim for thin, elegant slices about an eighth of an inch to a quarter of an inch thick.
Common Mistakes That Will Ruin Your Roast
Even with a straightforward recipe, it is easy to make a small misstep that can affect the final result. Here are the most common pitfalls to avoid when making this dish.
- Using a chuck roast instead of a lean sliceable cut. If you use a chuck roast, you will not get clean, beautiful slices. Instead, the meat will fall apart into shreds. While still delicious, it will not yield the elegant sliced presentation shown in the photo.
- Cooking the roast on the high setting. As mentioned, high heat is the enemy of lean beef. It cooks the meat too quickly, causing the proteins to tighten and dry out. Keep it on low for the best results.
- Opening the lid to peek. Slow cookers work by trapping heat and steam. Every time you lift the lid, you release a massive amount of heat, which can add fifteen to twenty minutes to your total cook time. Trust your digital probe thermometer and leave the lid closed.
- Slicing the meat too thick. Lean roasts are best enjoyed in thin slices. If you cut the slices too thick, they can feel heavy and chewy, even if cooked to a perfect medium-rare.
- Forgetting to deglaze the skillet. Searing creates a massive amount of flavor on the bottom of your pan. If you do not deglaze the skillet with your broth, you are leaving some of the best flavors of the dish behind.
What to Do with Leftovers
If you are lucky enough to have leftover French onion beef, you have the starting point for some of the best weekday lunches and quick dinners imaginable. Here are a few of my favorite ways to repurpose the leftovers.
- French Onion Beef Sliders: Place the bottom half of a pack of sweet Hawaiian rolls on a baking sheet. Layer on your leftover beef slices, a generous spoonful of the caramelized onions and gravy, and top with slices of Provolone or Swiss cheese. Place the top buns on, brush them with a little melted butter mixed with garlic powder, and bake at 350 degrees Fahrenheit for ten to twelve minutes until the cheese is melted and bubbling.
- Next-Level French Dip Sandwiches: Split a crusty baguette or hoagie roll and toast it lightly. Heat your leftover beef slices in a small pan with the remaining French onion gravy. Pile the warm beef and onions onto the rolls, top with Swiss cheese, and broil for a minute until the cheese melts. Serve with a cup of the warm gravy on the side for dipping.
- Quick Beef Stroganoff: Boil your favorite egg noodles. In a skillet, warm your leftover beef, onions, and gravy. Stir in half a cup of sour cream or Greek yogurt over low heat (do not let it boil, or the sour cream will curdle). Toss the warm noodles with the creamy beef and onion sauce for a cozy, comforting meal in under fifteen minutes.
- Loaded Baked Potatoes: Bake large russet potatoes until soft. Split them open, fluff the insides with a fork, and top with butter, warm sliced beef, caramelized onions, a generous drizzle of gravy, and a sprinkle of shredded Gruyere or mozzarella cheese. Pop them under the broiler until melted and golden.
Perfect Side Dishes to Complete the Meal
This rich, savory French onion beef roast deserves side dishes that can stand up to its bold flavors while helping to soak up that incredible gravy.
- Creamy Garlic Mashed Potatoes: This is the ultimate classic pairing. The contrast between the rich, velvety potatoes and the sweet, savory caramelized onion gravy is pure culinary perfection.
- Roasted Brussels Sprouts: Toss halved Brussels sprouts with olive oil, salt, pepper, and a splash of balsamic vinegar. Roast them at 425 degrees Fahrenheit until they are crispy and caramelized on the edges. The earthy bitterness of the sprouts balances the sweet notes of the onions beautifully.
- Crusty French Bread: A warm, crusty baguette is essential for making sure not a single drop of that incredible French onion gravy goes to waste on your plate.
- A Bright, Acidic Green Salad: Because this dish is quite rich and savory, a simple green salad tossed with a bright, zesty lemon vinaigrette helps cleanse the palate between bites.
Frequently Asked Questions
Can I make this recipe ahead of time?
Yes, this is an excellent dish for entertaining because it reheats beautifully. You can cook the roast, let it cool completely, and then slice it while cold, which actually allows you to get incredibly thin, clean slices. Store the sliced beef and the gravy with onions in separate airtight containers in the refrigerator. When ready to serve, place the beef slices in a baking dish, pour the gravy and onions over the top to keep the meat moist, cover with foil, and warm in a 325-degree Fahrenheit oven for fifteen to twenty minutes until hot.
Can I use frozen beef for this recipe?
I highly recommend thawing your beef completely in the refrigerator before cooking. Placing a frozen, solid block of meat into a slow cooker is a food safety hazard, as it takes too long for the center of the meat to reach a safe temperature, allowing bacteria to multiply. Additionally, cooking from frozen will severely affect the texture of the meat, making it difficult to achieve a perfect, even cook.
How long will leftovers keep in the refrigerator?
Stored in an airtight container with the gravy, the leftover beef will keep beautifully in the refrigerator for up to four days. In fact, the flavor of the gravy often improves after a day or two as the ingredients continue to meld.
My gravy is too thin, how can I fix it?
If your gravy is too thin after adding the cornstarch slurry and cooking on high, you can add a bit more slurry (half a tablespoon of cornstarch mixed with half a tablespoon of cold water) and let it simmer for another ten minutes. Alternatively, you can transfer the gravy and onions to a saucepan on your stovetop and simmer it over medium heat to reduce and thicken it more rapidly.
Can I use red wine in this recipe?
Absolutely. If you want to add an extra layer of classic French depth, you can replace half a cup of the beef broth with a dry red wine, such as Cabernet Sauvignon, Merlot, or Pinot Noir. Use the wine to deglaze your searing skillet, letting it simmer for a minute or two to burn off the harsh alcohol taste before adding the beef broth and pouring it into the slow cooker.
With these tips, techniques, and insights, you are ready to create a slow cooker meal that defies the old dry-meat stereotypes. This French onion beef roast is comforting, elegant, and packed with deep, rich flavor that will have your family and guests begging for seconds. Cook with patience, trust your thermometer, and enjoy every single bite of this cozy comfort food classic.


