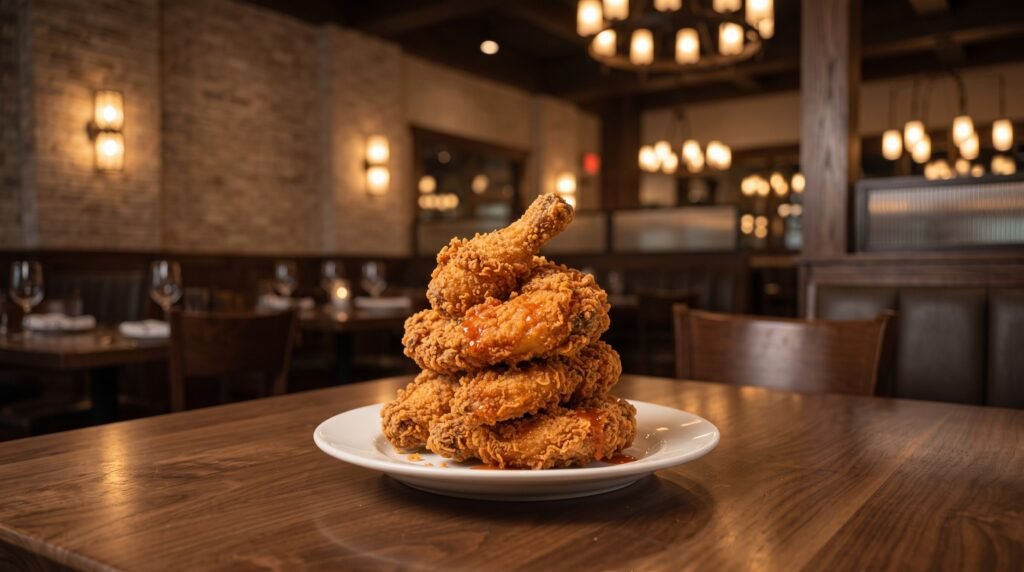

We have all been there. It is a warm weekend afternoon, your friends are coming over, and you have made a bold promise: the best homemade fried chicken they have ever tasted. You buy the bird, heat up a pot of oil, coat the pieces in flour, and toss them in. On the outside, it looks gorgeous. It is golden brown, bubbling, and smells incredible. But when someone takes that first bite, the skin slips off in one wet sheet, and the meat near the bone is still pink. Or worse, the crust is so hard it threatens to break a tooth, while the inside is dry as cardboard.
I know this pain intimately because that was my kitchen ten years ago. I spent an entire summer trying to replicate the perfect craggy, shatteringly crisp fried chicken I once had at a roadside shack in Tennessee. I went through dozens of chickens, tried every trick on the internet, burned my forearm with hot oil, and set off my smoke alarm more times than my neighbors care to remember.
But through those failures, I learned the science of frying. I learned that legendary fried chicken is not about luck. It is about a series of small, non-negotiable steps that work together to create magic. Today, I want to share those steps with you, along with the recipe for a sweet, spicy hot honey glaze that will make your kitchen the most popular spot in the neighborhood. Let us dive into the mechanics of crunch, moisture, and flavor.
Why Your Fried Chicken Has Been Soggy or Bland
Before we even look at the ingredients, we need to understand why fried chicken fails. The most common mistake is frying cold meat straight from the refrigerator. When ice-cold chicken hits hot oil, it instantly drops the oil temperature. The chicken then sits in lukewarm grease, absorbing it like a sponge instead of searing. This results in a greasy, soggy crust.
The second mistake is relying solely on the flour coating for flavor. If you do not season your chicken at every stage of the process, you will end up with a crust that tastes great and meat that tastes like nothing. We need to season the brine, season the flour, and season the finished chicken the second it comes out of the hot oil.
Finally, there is the flour itself. If you use only all-purpose flour, you are missing out. All-purpose flour contains gluten. When gluten mixes with moisture, it becomes elastic and tough. While that is great for a chewy loaf of sourdough, it is the enemy of a light, crispy chicken crust. By introducing a secret ingredient to our flour mix, we can break up that gluten structure and achieve a shatter-crisp texture that stays crunchy for hours.
The Secret Ingredient for Supreme Crunch
That secret ingredient is cornstarch. Cornstarch is pure starch with no gluten-forming proteins. When combined with all-purpose flour, it weakens the gluten network. It also absorbs moisture beautifully, drying out the surface of the wet chicken skin so the hot oil can crisp it up instantly.
I use a ratio of three parts all-purpose flour to one part cornstarch. If you want an even lighter, almost glass-like crunch, you can use rice flour instead of cornstarch. Both work wonders, but cornstarch is something most of us already have sitting in our pantry.
Another trick I learned from a southern cook is the moisture flick. Before you coat your chicken, you take a couple of tablespoons of your liquid brine and drizzle it directly into your flour mixture. Rub the flour together with your fingers until tiny, damp clumps form throughout the bowl. When you press your wet chicken into the flour, these little dry-and-wet clumps will cling to the surface. As they fry, they puff up into those beautiful, craggy, jagged ridges that you see in high-end fried chicken joints. Those ridges are what trap the hot honey and provide the ultimate crunch.
The Power of the Buttermilk Brine
If you want juicy meat, you cannot skip the brine. A brine does two things: it seasons the meat all the way to the bone, and it breaks down the muscle fibers so they retain moisture during the high-heat frying process.
For fried chicken, buttermilk is the undisputed king. It is mildly acidic, containing lactic acid that gently tenderizes the chicken without turning the meat mushy. To make the brine even more effective, I like to add a splash of pickle juice. The vinegar and dill notes in pickle juice add a subtle tang that cuts beautifully through the rich, fatty nature of the fried skin.
I also add hot sauce, garlic powder, and a generous amount of kosher salt to the buttermilk. Do not worry about the hot sauce making the chicken too spicy for kids; the heat mellows out significantly during frying, leaving behind a rich, savory depth of flavor.
Choosing Your Chicken Cuts
You can fry any part of the bird, but if you are looking for the most forgiving and flavorful experience, stick to dark meat. Chicken thighs and drumsticks have more fat and connective tissue than breast meat. This means they can withstand the high heat of deep frying without drying out.
If you do want to fry chicken breasts, I highly recommend cutting them into smaller, uniform strips or nuggets. A whole, thick chicken breast takes so long to cook through that the outer crust will almost certainly burn before the center reaches a safe temperature. By cutting them down, you ensure the cooking times of the crust and the meat are perfectly synchronized.
The Crispy Hot Honey Fried Chicken Recipe
Here is everything you will need to recreate this masterpiece in your own kitchen. This recipe makes enough for about four hungry people.
| Ingredient | Amount | Purpose |
|---|---|---|
| Bone-in, skin-on chicken thighs and drumsticks | 3 pounds | The flavorful, juicy foundation |
| Whole buttermilk | 2 cups | The acidic base for tenderizing |
| Dill pickle juice | 0.5 cup | Adds acidity and bright herbaceous flavor |
| Hot sauce (your favorite cayenne-based brand) | 0.25 cup | Seasons the meat and adds mild heat |
| Kosher salt | 2 tablespoons | Divided between the brine, flour, and final seasoning |
| All-purpose flour | 2 cups | The base of our crispy coating |
| Cornstarch | 0.66 cup | Reduces gluten and increases crunch |
| Garlic powder | 1 tablespoon | Adds savory depth to the flour mix |
| Onion powder | 1 tablespoon | Adds sweet, earthy undertones to the flour |
| Smoked paprika | 1 tablespoon | Adds rich color and a subtle smoky aroma |
| White pepper | 1 teaspoon | Classic southern heat profile for the flour |
| Cayenne pepper | 0.5 teaspoon | Adjust to your personal heat tolerance |
| Neutral cooking oil (peanut, canola, or lard) | 4 to 6 cups | For frying (high smoke point is essential) |
| High-quality honey | 0.5 cup | The sweet base of our glaze |
| Apple cider vinegar | 1 tablespoon | Cuts the sweetness of the honey |
| Red pepper flakes | 1 teaspoon | Infuses the honey with heat |
Step-by-Step Instructions
Now that you have gathered your ingredients, let us walk through the process. Take your time with each step. Good fried chicken cannot be rushed.
Step 1: The Long Soak
Start by placing your chicken pieces in a large bowl or a heavy-duty gallon zip-top bag. Pour in the buttermilk, pickle juice, hot sauce, and one tablespoon of kosher salt. Give it a good mix to ensure every piece of chicken is submerged and coated.
Seal the container and place it in the refrigerator. You want to leave it in there for at least four hours, but overnight (around twelve to eighteen hours) is the sweet spot. Do not go past twenty-four hours, or the acid will begin to break down the meat too much, making it mushy.
Step 2: Bring to Room Temp
This is a step many people skip, and it is a critical error. Take your chicken out of the refrigerator about thirty to forty minutes before you plan to fry. You want to take the chill off the meat. Frying ice-cold chicken drops the temperature of your cooking oil too rapidly, leading to greasy crusts and unevenly cooked meat.
Step 3: Mix the Flour and Hydrate
In a large, shallow dish (a pie pan or a wide baking dish works beautifully), whisk together the all-purpose flour, cornstarch, garlic powder, onion powder, smoked paprika, white pepper, cayenne pepper, and the remaining tablespoon of kosher salt.
Now, perform the moisture flick. Dip your fingers into the cold buttermilk brine and flick it over your flour mixture. Do this three or four times. Use a fork or your fingers to gently toss the flour around, creating those little damp clumps we talked about earlier.
Step 4: The Coating Process
Working with one piece of chicken at a time, lift it out of the buttermilk brine. Let the excess liquid drip off for a couple of seconds, but do not shake it dry. You want some of that moisture on the skin to act as glue.
Place the chicken into the flour mixture. Toss flour over the top, then press down firmly with your palms. Flip the chicken and press down again. You want to make sure the flour gets into every single nook, cranny, and fold of the skin.
Lift the coated chicken piece and shake it gently over the dish to remove any loose, excess flour. You should see a highly textured, shaggy coating clinging to the meat.
Step 5: The Rest Period
Do not drop the chicken straight into the oil yet. Place the coated chicken pieces on a wire rack set inside a baking sheet. Let them rest there for about fifteen to twenty minutes.
During this rest period, the moisture from the chicken skin and the buttermilk will hydrate the flour. The coating will turn from a dry, dusty powder into a tacky paste that adheres firmly to the chicken. This ensures that your crust will stay locked onto the meat during the violent bubbling of the frying process instead of flaking off into the oil.
Step 6: Prepare the Oil
While the chicken is resting, prepare your frying setup. A heavy, deep cast-iron skillet or a Dutch oven is the best tool for the job. Cast iron retains heat incredibly well, which prevents dramatic temperature drops when you add the meat.
Pour in enough oil to submerge the chicken pieces halfway. You do not need a deep fryer that covers the entire bird; shallow frying in a couple of inches of oil works perfectly and uses far less oil.
Set your burner to medium-high heat and heat the oil to 350 degrees Fahrenheit. Use a clip-on candy thermometer or an instant-read digital thermometer to monitor this. Do not guess. If you do not have a thermometer, drop a tiny pinch of your flour mix into the oil. If it sizzles immediately and dissolves, the oil is ready. If it burns instantly, it is too hot. If it sinks slowly with lazy bubbles, it is too cold.
Step 7: The Fry
Carefully lower the chicken pieces into the hot oil, skin-side down. Do not overcrowd the pan. If you crowd too many pieces of meat together, the oil temperature will plummet, and the pieces will steam each other instead of frying. If you are using a standard twelve-inch skillet, fry in batches of three or four pieces at a time.
Once the chicken is in, monitor your thermometer. You want the oil to stay between 310 and 325 degrees Fahrenheit during the actual cooking process.
Fry the chicken for about eight to ten minutes on the first side. You will see the edges turning a deep, rich golden brown. Carefully flip the pieces over using metal tongs. Fry for another six to eight minutes on the second side.
The only true way to know when your chicken is done is by checking the internal temperature. Insert an instant-read thermometer into the thickest part of the meat, making sure you do not hit the bone. Drumsticks and thighs are safe to eat at 165 degrees, but they taste much better and are far more tender when cooked to 175 or 180 degrees. White meat, however, should be pulled out right at 165 degrees.
Step 8: Drain and Season
Once cooked, lift the chicken out of the hot oil. Hold it over the pan for a second to let any excess oil drip off.
Place the chicken onto a clean wire rack set over a baking sheet. Do not place the hot chicken onto paper towels. While paper towels do absorb grease, they also trap steam underneath the hot chicken. That steam will quickly soften your beautifully crispy crust, making the bottom of your chicken soggy. A wire rack allows air to circulate completely around the meat, keeping it crispy on all sides.
Immediately sprinkle a tiny pinch of kosher salt over the hot chicken. The heat and remaining trace oil on the surface will lock the salt in, boosting all the other spices we worked so hard to build.
Step 9: Make the Hot Honey
While your chicken rests for a few minutes to let the juices redistribute, whip up your hot honey.
In a small saucepan over low heat, combine the honey, apple cider vinegar, and red pepper flakes. Heat it gently until the honey becomes warm and runny. Do not boil it; you just want to warm it enough to infuse the red pepper flakes and let the vinegar blend in. Remove from the heat.
Using a spoon or a pastry brush, drizzle the warm hot honey generously over the crispy fried chicken right before serving. The combination of the sweet honey, the sharp kick of the pepper flakes, and the tang of the vinegar on top of the salty, crunchy skin is nothing short of addictive.
Essential Equipment to Make Your Life Easier
While you can make fried chicken with basic tools, investing in a few cheap kitchen essentials will make your results consistent and your clean-up much easier.
- A digital instant-read thermometer. This is the single most important tool in any kitchen. It takes the guesswork out of meat safety and guarantees you will never serve raw or overcooked chicken again.
- A heavy cast-iron skillet or Dutch oven. These pans hold onto heat like a champ, making oil temperature regulation a breeze.
- A wire cooling rack. This is non-negotiable for maintaining that crispy texture once the chicken comes out of the oil.
- A splatter screen. Hot oil will jump out of the pan. A cheap mesh splatter screen keeps your stovetop clean and protects your arms from grease burns.
Common Mistakes to Avoid
Even with the best instructions, things can go sideways. Here are a few things I learned to watch out for during my years of trial and error.
- Using the wrong oil. Do not use extra virgin olive oil or unrefined coconut oil. They have low smoke points and will burn at 350 degrees, imparting a bitter, burnt taste to your chicken. Stick to peanut oil, canola oil, or vegetable oil.
- Leaving the oil unattended. Hot oil can go from a perfect 350 degrees to a dangerous flashpoint in a matter of minutes if your burner is set too high. Keep your eyes on the pan and your thermometer close.
- Forgetting to skim the oil. Between batches of chicken, you will notice little burnt bits of flour floating in the pan. Use a small mesh strainer or a slotted spoon to scoop those out. If you leave them in, they will stick to your next batch of chicken, leaving bitter, black spots on your beautiful crust.
- Letting the chicken sit. Fried chicken is at its absolute peak within fifteen minutes of coming out of the oil. Do not let it sit on the counter for an hour while you finish making sides. Plan your meal so that the chicken is the last thing to finish cooking.
Keeping Leftovers Crispy
If by some miracle you have leftover fried chicken, do not throw it in the microwave. The microwave will turn the crust into a rubbery, soggy mess.
Instead, place the cold chicken on a wire rack set inside a baking sheet and heat it in a 350-degree oven for about fifteen minutes. The dry heat of the oven will melt the fat inside the crust, re-crisping it to near-original perfection while warming the meat gently.
Mastering fried chicken is a journey of patience and precision. Once you understand the role of acid in the brine, starch in the flour, and temperature control in the oil, you can cook with absolute confidence. Fire up your stove, get that oil hot, and prepare to make the best fried chicken of your life. Your kitchen is about to become the legendary spot you always wanted it to be.