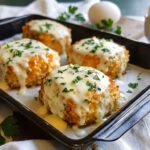
The smell of braised beef ribs wafting through a house on a Sunday afternoon is a form of culinary magic. It is a scent that wraps around you like a warm blanket, promising a meal that is rich, deeply comforting, and absolutely worth the hours of waiting. But I will be honest with you: my relationship with beef short ribs did not start on a high note.
Years ago, during my early days of experimenting in the kitchen, I bought a beautiful batch of bone-in beef short ribs. They were thick, marbled, and expensive enough to make my wallet wince. Eager to eat, I treated them like steaks. I threw them in a scorching hot pan, seared them quickly, and served them up. The result was an absolute disaster. We ended up with something that had the texture of a leather boot. It was practically unchewable, and I was devastated.
That was the day I learned my first major lesson in meat science: tough cuts need time, love, and moisture. Since that kitchen catastrophe, I have spent years perfecting the art of the slow braise. I have experimented with oven temperatures, various braising liquids, different cuts of ribs, and endless glaze variations. Today, I am sharing the holy grail of beef short rib recipes. These ribs are so tender they practically slide off the bone, coated in a sticky, glossy, sweet-and-savory glaze that will have you licking your fingers and scraping every last drop of sauce off the platter.
Let us dive into the details so you can skip the trial-and-error phase and go straight to culinary triumph.
Why Slow Cooking is Non Negotiable for Short Ribs
To understand how to cook a perfect short rib, we have to talk about what makes this cut of meat so unique. Short ribs come from the lower portion of the rib cage of the steer. This is a muscular area that does a lot of work, which means the meat is packed with tough connective tissue, specifically collagen.
If you cook a short rib quickly over high heat, those collagen fibers tighten up like rubber bands, locking in the toughness and making the meat impossible to eat. However, when you expose those same fibers to low, gentle heat over several hours in a moist environment, something miraculous happens. The collagen begins to break down. It slowly melts and transforms into gelatin.
This gelatin does two beautiful things. First, it coats the muscle fibers, keeping them incredibly moist and giving the meat that signature melt-in-your-mouth texture. Second, it seeps into the braising liquid, giving the sauce a rich, velvety body that you simply cannot replicate with cornstarch or flour. This is why patience is your greatest ingredient when making this recipe. There are no shortcuts to breaking down collagen.
Selecting the Right Ribs: English Cut vs Flanken Cut
When you head to the butcher shop or the grocery store, you will likely see beef short ribs cut in two different ways. Knowing the difference is crucial for this recipe.
The first is the English cut. This is what you see in the photo. The ribs are cut parallel to the bone, resulting in thick, rectangular blocks of meat sitting on top of a single segment of flat bone. This is the ultimate cut for slow braising. The thick block of meat stays intact during the long cooking process, keeping the juices locked inside.
The second is the Flanken cut. This is when the ribs are sliced across the bones, resulting in thin strips of meat containing three or four small cross-sections of bone. This cut is highly popular in Korean barbecue, where it is marinated and grilled quickly over high heat. While delicious, Flanken-cut ribs will disintegrate if you try to braise them for three hours.
For this sticky glazed recipe, always ask your butcher for thick-cut English style beef short ribs. Look for pieces that have a generous amount of meat on top of the bone and a good amount of marbling. Marbling refers to those little white flecks of fat distributed throughout the red meat. This fat will render down during the braise, self-basting the meat from the inside out. Avoid ribs that have a massive, thick layer of solid white fat on top with very little meat underneath. You want a balanced cut.
The Secret to the Perfect Sticky Glaze
The glaze is what takes these ribs from standard comfort food to a restaurant-quality showstopper. A great glaze needs to strike a perfect balance of four flavor profiles: savory, sweet, acidic, and aromatic.
For the savory base, we rely on the rendered beef juices mixed with a touch of soy sauce. The soy sauce adds depth and that hard-to-define umami quality that makes your mouth water.
For the sweetness, we use brown sugar. Brown sugar contains molasses, which adds a rich, caramel-like undertone. As the glaze reduces on the stovetop, the sugar caramelizes, creating that sticky, glossy coating that clings to the meat.
For acidity, we use apple cider vinegar. This is an incredibly important component that many home cooks overlook. Because beef short ribs are highly rich and fatty, a glaze that is purely sweet and savory can quickly taste heavy and cloying. A splash of vinegar cuts through the richness, brightening up the entire dish and balancing the sweetness of the sugar.
Finally, we have our aromatics: fresh garlic, shallots, and ginger. These ingredients infuse the braising liquid with a fragrant, savory base that slowly penetrates the meat as it cooks.
Ingredients for Sticky Glazed Beef Short Ribs
Before you head to the kitchen, gather your ingredients. Having everything measured out and ready to go (a practice chefs call mise en place) makes the cooking process smooth and stress-free.
| Ingredient | Quantity | Purpose |
|---|---|---|
| Bone-in English cut beef short ribs | 4 to 5 pounds | The star of the show, rich and marbled |
| Kosher salt | 1.5 tablespoons | To season the meat and draw out flavor |
| Coarse black pepper | 1 tablespoon | For a bold, savory crust |
| Avocado oil or canola oil | 2 tablespoons | For searing the ribs at high heat |
| Shallots, finely chopped | 2 medium | Adds a sweet, delicate onion flavor |
| Garlic cloves, minced | 6 cloves | For a rich, aromatic base |
| Fresh ginger, grated | 1 tablespoon | Adds a subtle, warm zip to the glaze |
| Beef bone broth | 2 cups | The rich liquid base for the braise |
| Low-sodium soy sauce | 0.5 cup | Adds savory depth and umami |
| Dark brown sugar | 0.5 cup | For caramelization and stickiness |
| Apple cider vinegar | 3 tablespoons | Cuts the richness and balances the sweetness |
| Tomato paste | 2 tablespoons | Thickens the sauce and adds rich tomato flavor |
| Fresh parsley, chopped | For garnish | Adds a pop of color and freshness |
Step by Step Instructions
Now that you have your ingredients ready, let us walk through the process step by step. I will guide you through the techniques that make a difference between a good dish and an unforgettable one.
Step 1: Prep and Season the Ribs
Take your short ribs out of the refrigerator about thirty minutes before you plan to start cooking. This brings them closer to room temperature. If you throw ice-cold meat into a hot pan, the temperature of the pan will drop instantly, and the meat will steam rather than sear.
Use a roll of paper towels to pat each short rib completely dry. I cannot stress this enough: moisture is the enemy of a good sear. If there is water on the surface of the meat, it will turn to steam when it hits the hot oil, preventing that beautiful brown crust from forming.
Once dry, season the ribs generously on all sides with the kosher salt and coarse black pepper. Do not be shy here. Short ribs are thick, dense cuts of meat, and they require a good amount of seasoning to bring out their natural beefy flavor.
Step 2: The Crucial Sear
Place a large, heavy-bottomed Dutch oven or deep cast-iron skillet over medium-high heat. Add the avocado oil. I prefer avocado oil because it has a high smoke point, meaning it can get very hot without burning and creating bitter flavors.
Once the oil is shimmering and just starting to show a faint wisp of smoke, carefully add the short ribs to the pan. Do not crowd the pan! If you have five or six large ribs, sear them in batches of three. If you crowd them, they will release their juices and boil in their own liquid, turning gray and tough.
Let the ribs sear undisturbed for about three to four minutes per side. You are looking for a deep, dark brown crust to form. This crust is the result of the Maillard reaction, a chemical reaction between amino acids and reducing sugars that gives seared meat its incredibly rich, savory flavor. Use tongs to turn the ribs, searing the bottom, top, sides, and ends. Once fully seared, transfer the ribs to a plate and set them aside.
Step 3: Build the Aromatic Base
Turn the heat down to medium. You will notice a lot of rendered fat and dark brown bits stuck to the bottom of the pan. This is called fond, and it is absolute gold. Do not wipe it out!
If there is an excessive amount of liquid fat in the pan (more than three tablespoons), spoon some of it out. Leave enough to coat the bottom of the pan. Add the finely chopped shallots to the hot fat. Cook them for about three minutes, stirring constantly, until they are soft and translucent.
Next, add the minced garlic and grated ginger. Cook these for just one minute. Watch them closely; garlic burns easily, and burnt garlic will make your entire sauce taste bitter. You will know it is ready when your kitchen suddenly smells like a high-end restaurant.
Add the tomato paste to the pan. Stir it into the onions and garlic, cooking it for about two minutes. You want the tomato paste to turn from a bright red to a deeper, rusty brick-red color. This caramelizes the sugars in the tomato, taking away the raw, metallic taste and adding a deep savoriness to the base.
Step 4: Deglaze and Simmer
Now it is time to deglaze the pan. Pour in the beef bone broth, soy sauce, apple cider vinegar, and dark brown sugar. Use a wooden spoon to scrape up all those beautiful caramelized brown bits stuck to the bottom of the pan. They will dissolve into the liquid, infusing it with incredible flavor.
Bring the mixture to a gentle simmer, stirring to ensure the brown sugar is completely dissolved. Taste the liquid. It should taste bold, savory, slightly sweet, and tangy.
Step 5: Into the Oven
Preheat your oven to 300 degrees Fahrenheit (150 degrees Celsius).
Nestle the seared short ribs back into the Dutch oven. Place them bone-side down, with the thick meat pointing upward. The braising liquid should come about halfway to two-thirds of the way up the sides of the ribs. It should not cover them completely. Braising is a combination of simmering (for the submerged part of the meat) and steaming (for the exposed part).
Place the lid on your Dutch oven. If your lid does not fit tightly, place a piece of aluminum foil over the top of the pot first, then press the lid down over it. This creates a tight seal, keeping all that valuable moisture inside the pot.
Place the pot in the preheated oven and let it bake undisturbed for three to three and a half hours.
Around the two and a half hour mark, your kitchen will start to smell incredible. Resist the urge to open the oven and peek. Every time you open the lid, you let out the steam and heat, which can extend the cooking time.
Step 6: Checking for Doneness
At the three-hour mark, carefully remove the pot from the oven and lift the lid.
To check if the ribs are done, insert a fork into the center of the meat. It should slide in and out with absolutely no resistance. The meat should feel incredibly soft, and you should see that it has pulled back significantly from the bone, exposing a clean inch or two of bone at the end. This is a visual indicator that the connective tissues have successfully melted.
If the meat still feels a bit tight or springy, put the lid back on and return the pot to the oven for another thirty minutes. Every animal is different, and some cuts simply take a little longer to break down.
Step 7: Crafting the Sticky Glaze
Once the ribs are perfectly tender, use a slotted spoon or tongs to carefully transfer them to a baking sheet. Be gentle here; they are so tender that they can easily fall apart.
Now, look at the liquid left behind in your pot. It will be rich and incredibly flavorful, but it will also have a thick layer of yellow oil floating on top. This is the fat that rendered out of the short ribs. If you try to reduce the sauce with all this fat in it, your glaze will end up greasy and separated.
To fix this, we need to skim the fat. If you have a fat separator cup, pour the liquid into it and let it sit for a minute. The fat will rise to the top, allowing you to pour the pure, rich juices from the bottom back into your pot.
If you do not have a fat separator, you can use a wide, shallow spoon to carefully skim the oil off the surface of the liquid. Another trick is to drag a clean paper towel lightly across the surface; it will absorb the oil while leaving the dark juices behind.
Once the fat is removed, place the Dutch oven back on the stovetop over medium-high heat. Bring the liquid to a rolling boil. You want to reduce this liquid by about half or until it thickens into a glossy, syrup-like glaze that coats the back of a spoon. This should take about ten to fifteen minutes. Keep an eye on it and stir occasionally to prevent the sugars from burning on the sides of the pot.
Step 8: Glaze and Broil
Turn your oven broiler on high.
Using a pastry brush, generously paint the reduced glaze all over the top and sides of the short ribs on the baking sheet.
Place the baking sheet under the broiler for three to four minutes. Watch them like a hawk! Because the glaze contains brown sugar, it can go from perfectly caramelized to burnt in a matter of seconds. You are looking for the glaze to bubble furiously, darken in color, and develop sticky, slightly charred edges.
Remove the ribs from the oven, brush them with another layer of the warm glaze from the pot, and transfer them to a serving platter. Garnish with a handful of fresh chopped parsley for a burst of color and fresh flavor. Serve any remaining glaze on the side for drizzling.
Adapting for the Slow Cooker
If you have a busy day ahead and want to come home to a house smelling of rich beef ribs, you can easily adapt this recipe for a slow cooker.
Begin by following the prepping and searing steps exactly as written. Searing the meat in a pan is a step you cannot skip, even when using a slow cooker. The slow cooker cannot reach the high temperatures required to create that flavorful brown crust. If you skip this step, your ribs will end up tasting boiled and lack depth of flavor.
Once seared, transfer the ribs to your slow cooker.
In the same pan you used to sear the ribs, sauté the shallots, garlic, ginger, and tomato paste as directed. Pour in the beef broth, soy sauce, apple cider vinegar, and brown sugar, scraping up the brown bits. Once hot and combined, pour this mixture over the ribs in the slow cooker.
Cover and cook on LOW for seven to eight hours, or on HIGH for four to five hours. I highly recommend the low setting, as a slower cook yields a more tender result.
Once finished, carefully remove the ribs, skim the fat from the liquid, and transfer the liquid to a saucepan on the stove. Boil the liquid to reduce it into a glaze, brush it onto the ribs, and broil them in the oven just like in the original recipe.
Adapting for the Instant Pot or Pressure Cooker
When you are short on time but still craving that slow-cooked texture, the pressure cooker is your best friend.
Use the SAUTE function on your pressure cooker to sear the seasoned ribs in batches. Remove them, then sauté the aromatics and deglaze the inner pot with the liquid ingredients, making sure to scrape the bottom clean to avoid getting a burn notice.
Return the ribs to the pot, lock the lid in place, and set the valve to sealing. Cook on HIGH PRESSURE for forty-five minutes.
Once the cooking time is complete, allow the cooker to naturally release its pressure for fifteen minutes before venting any remaining steam. This natural release is crucial; if you perform a quick release immediately, the sudden drop in pressure will cause the muscle fibers in the meat to seize up, making the beef tough.
Remove the ribs, skim the fat, and use the SAUTE function to reduce the liquid into a thick glaze. Brush and broil as directed.
Common Mistakes to Avoid
While this recipe is highly forgiving, a few common slip-ups can stand between you and short rib perfection. Keep these tips in mind as you cook.
First, do not skip the searing step. I know it adds an extra pan to wash and takes about fifteen minutes of standing over a hot stove, but it is the foundation of the entire dish's flavor. The caramelized proteins from the sear are what give the glaze its deep, savory complexity.
Second, be diligent about skimming the fat. Short ribs are an incredibly fatty cut of meat. If you skip skimming the braising liquid before reducing it, your glaze will split, leaving you with a greasy, oily mess that slides right off the meat instead of clinging to it.
Third, do not rush the cook time. If your timer goes off and the meat still feels slightly tough, it simply needs more time. Connective tissue does not care about your schedule; it melts when it is ready. Put the lid back on and let it cook.
Finally, keep a close eye on the ribs under the broiler. The transition from beautifully caramelized to black and bitter happens incredibly fast due to the sugars in the glaze. Do not walk away from the oven during this step.
What to Serve with Glazed Beef Ribs
These ribs are incredibly rich, sweet, and savory, which means you want to pair them with side dishes that can either soak up that glorious glaze or cut through the richness.
Creamy garlic mashed potatoes are the classic choice. There is nothing quite like a spoonful of smooth potatoes mixed with a pool of sticky beef glaze.
Another fantastic option is creamy polenta or stone-ground grits. The subtle corn flavor and creamy texture provide a perfect bed for the tender beef.
To balance the heavy, rich nature of the meat, I always like to serve something bright and acidic on the side. A crisp green salad tossed in a sharp lemon vinaigrette works wonderfully. Alternatively, roasted broccolini with a squeeze of fresh lemon juice or quick-pickled red onions can cut through the fat and refresh your palate between bites.
Storing and Reheating Tips
Here is a secret that every food blogger and chef knows: braised beef ribs taste even better the next day.
As the ribs sit in the refrigerator overnight, the flavors in the meat and sauce continue to meld and deepen. Furthermore, storing them overnight makes fat removal incredibly easy. The fat will rise to the top of the container and solidify into a hard, white disc. You can simply lift this disc off with a spoon and discard it, leaving you with a perfectly fat-free, gelatin-rich sauce underneath.
To store, let the ribs and sauce cool to room temperature, then transfer them to an airtight container and refrigerate for up to four days.
When you are ready to reheat, place the ribs and their sauce in a covered baking dish. Bake at 325 degrees Fahrenheit (160 degrees Celsius) for about twenty minutes, or until the meat is heated through. You can brush them with a fresh layer of glaze and pop them under the broiler for a minute to restore that sticky exterior.
You can also freeze these ribs. Wrap the cooked ribs tightly in plastic wrap, place them in a freezer-safe bag, and pour the sauce into a separate container. They will keep well in the freezer for up to three months. Thaw them in the refrigerator overnight before reheating.
Final Thoughts
Cooking beef short ribs is a reminder of why slow food is so special. In a world where everything is fast and instant, there is something deeply satisfying about taking a tough, inexpensive cut of meat and using time, heat, and basic culinary techniques to transform it into something magnificent.
This recipe does not require fancy equipment or complex kitchen skills. It simply requires patience, a good sear, and a watchful eye on the glaze. The next time you have a free Sunday afternoon, invite some friends or family over, put a batch of these ribs in the oven, and let the aroma do the hosting for you. They will be talking about this meal for weeks to come.