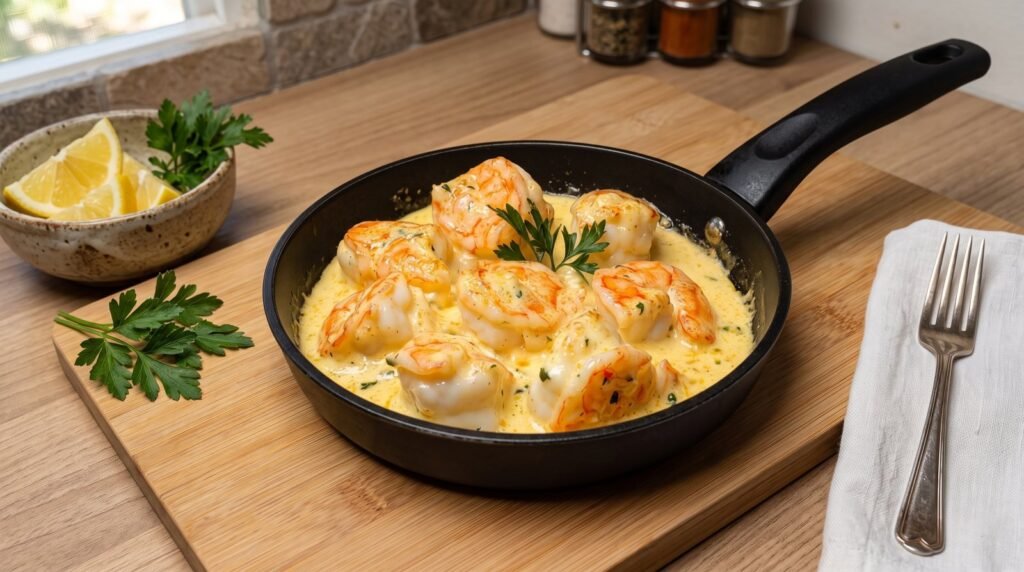

We have all been there. You walk into a restaurant, order a premium seafood dish, and wait with high expectations. When the plate arrives, the shrimp looks plump and beautiful, but the moment you take a bite, it feels like you are chewing on a rubber band. Or worse, the cream sauce looks luxurious but tastes bland, oily, and completely separated. For years, I avoided making shrimp at home because I thought seafood was some kind of culinary dark art reserved for professional chefs. I was terrified of overcooking it, under-seasoning it, or turning my kitchen into a fishy-smelling disaster zone.
But one cold Friday evening, after a particularly long week, I wanted something comforting, fast, and incredibly indulgent. I had a bag of frozen jumbo shrimp in the freezer and some leftover heavy cream in the fridge. I decided to stop overthinking and just start cooking. That night, after a few trials, errors, and one very smoky kitchen, I cracked the code. I created a creamy garlic butter shrimp dish that was so velvety, rich, and perfectly tender that my family literally licked the pan clean.
Today, I want to share that exact recipe with you. I will walk you through every single step, share the rookie mistakes I made so you can avoid them, and explain the simple kitchen science that makes this sauce absolutely fool-proof. Whether you are hosting a fancy dinner party or just want to treat yourself on a quiet weeknight, this recipe is going to become your new favorite go-to.
The Secret to Buying the Right Shrimp
Before we even turn on the stove, we need to talk about the main event: the shrimp. Walking up to the seafood counter at the grocery store can be incredibly overwhelming. You are faced with dozens of options: wild-caught, farm-raised, fresh, frozen, tail-on, tail-off, and bizarre numbers like sixteen-twenty or twenty-six-thirty.
Here is the first major lesson I learned: unless you live right on the coast and are buying directly from a boat that docked this morning, always buy frozen shrimp.
The fresh shrimp you see sitting on ice at the supermarket counter is almost always just frozen shrimp that the staff thawed out a day or two ago. Once shrimp is thawed, its shelf-life clock starts ticking fast. By the time you buy it, take it home, and cook it, it might have been sitting in that display case for days, losing its sweet flavor and firm texture. When you buy individually quick-frozen shrimp, you are in control of when it thaws, ensuring maximum freshness.
Look for bags labeled with U-12 or U-15, or numbers like 16/20. These numbers tell you how many shrimp make up a pound. The smaller the number, the bigger the shrimp. For a rich, creamy dish like this, you want large, jumbo, or colossal shrimp. Big shrimp are much more forgiving to cook because they take slightly longer to heat through, giving you a wider window of perfection before they overcook.
I also highly recommend buying shrimp that are already peeled and deveined, but with the tails still left on. Peeling and deveining a pound of shrimp by hand is a tedious, messy chore that can easily suck the joy out of cooking. Leaving the tails on is not just for looks; the tail shells contain deep savory sugars that infuse into the butter and cream as they cook, adding a subtle depth of flavor to your sauce.
Preparing Your Shrimp for Greatness
If you are using frozen shrimp, you need to thaw them safely. Never, ever use warm or hot water to speed up the process. Warm water will actually start cooking the outside of the shrimp, turning them mushy and ruining their texture before they ever touch the pan.
Instead, place your frozen shrimp in a large bowl of cold tap water. Let them sit for about ten to fifteen minutes, stirring them occasionally. They thaw incredibly fast. Once they are no longer icy, drain them thoroughly in a colander.
Now comes the most important step for getting a beautiful sear: you must dry the shrimp completely.
If your shrimp are wet when they hit the hot pan, the water will instantly turn to steam. Instead of getting a gorgeous, golden-brown crust, your shrimp will boil in their own juices. This results in pale, rubbery shrimp. Line a large plate or cutting board with a few layers of paper towels, lay the thawed shrimp out in a single layer, and pat them firmly with more paper towels. They should be bone-dry to the touch.
Once dry, toss them gently in a small bowl with a pinch of salt, freshly cracked black pepper, and a tiny dusting of sweet paprika. The paprika does not make them spicy, but it adds a beautiful warm undertone and helps them develop a rich, appetizing color when they hit the pan.
The Anatomy of the Sauce Ingredients
Let us talk about the supporting cast that transforms these simple shrimp into a restaurant-worthy masterpiece. This sauce relies on emulsification, which is just a fancy word for forcing fat and liquid to merge into a smooth, creamy harmony.
First, we use a combination of unsalted butter and extra virgin olive oil. If you use only butter, the milk solids will burn easily in a hot pan. If you use only olive oil, you miss out on that signature rich flavor. By combining them, you get the best of both worlds: a higher smoke point and a deep, buttery base.
Next is the garlic. Please promise me you will not use the pre-jarred minced garlic from the store. That stuff is preserved in citric acid, which gives it a harsh, metallic, bitter taste that will ruin your cream sauce. Take five minutes to peel and finely mince fresh garlic cloves. The fragrance of fresh garlic cooking in warm butter is one of the greatest scents on earth, and it makes a world of difference in the final dish.
For the liquid base, we use dry white wine. A good rule of thumb is to never cook with a wine you would not be happy to drink from a glass. Avoid supermarket cooking wines, which are loaded with sodium and preservatives. Instead, grab a bottle of Pinot Grigio, Sauvignon Blanc, or a dry Chardonnay. The natural acidity in the wine cuts through the heavy fat of the butter and cream, brightening up the entire dish. If you prefer to cook without alcohol, you can easily substitute low-sodium chicken broth or vegetable stock mixed with a squeeze of fresh lemon juice.
Finally, we have the heavy cream. Do not try to use milk, half-and-half, or light cream here. Lower-fat dairy products contain too much water and not enough fat. When you mix them with acidic ingredients like wine or lemon juice over heat, they will instantly curdle, turning your beautiful sauce into a clumpy, watery mess. Heavy whipping cream has the fat structure to withstand the heat and acid, reducing down into a naturally thick, velvety coating without needing any flour or cornstarch.
| Ingredient | Amount | Notes |
|---|---|---|
| Jumbo shrimp | 1 pound | Peeled and deveined, tails left on |
| Unsalted butter | 3 tablespoons | Divided into separate portions |
| Olive oil | 1 tablespoon | Extra virgin |
| Garlic | 5 cloves | Finely minced or grated |
| Dry white wine | 1/2 cup | Pinot Grigio or Sauvignon Blanc |
| Heavy whipping cream | 1 cup | Full fat for stability |
| Fresh lemon juice | 1 tablespoon | Squeezed from a real lemon |
| Salt and black pepper | To taste | Use freshly ground if possible |
| Sweet paprika | 1/4 teaspoon | For color and depth |
| Fresh flat-leaf parsley | 3 tablespoons | Finely chopped |
| Grated Parmesan cheese | 1/4 cup | Finely grated, optional |
Step-by-Step Cooking Guide
Now that our ingredients are prepped and lined up next to the stove, it is time to cook. This process moves incredibly fast, so make sure you have everything measured out and ready to go before you turn on the heat.
Step 1: Searing the Shrimp
Place a large skillet, preferably cast-iron or heavy-bottomed stainless steel, over medium-high heat. Add one tablespoon of the butter and the one tablespoon of olive oil. Let the butter melt and swirl the pan to coat the bottom. You want the pan to be hot. You should hear a gentle sizzle when a corner of a shrimp touches the oil.
Carefully place your dried, seasoned shrimp in the pan in a single, even layer. Do not crowd the pan. If your skillet is small, cook them in two separate batches. If you crowd them, they will release their juices, lower the pan temperature, and steam instead of sear.
Let the shrimp cook undisturbed for exactly two minutes. Do not move them around, do not poke them, just let them sit. This undisturbed contact is what creates that beautiful, caramelized golden crust.
Flip the shrimp over using tongs. Cook them on the second side for only one to two minutes. They are done the second they turn opaque and curve into a gentle C shape. If they curl up tightly into tight little O shapes, they are overcooked and will be tough.
Immediately transfer the cooked shrimp to a clean plate and set them aside. Do not leave them in the hot pan, or they will continue to cook from the residual heat.
Step 2: Building the Flavor Base
Turn the burner heat down to medium. Your skillet will have some beautiful, brown, caramelized bits stuck to the bottom. This is pure flavor gold.
Add another tablespoon of butter to the pan. Once melted, add your minced garlic. Stir the garlic constantly with a wooden spoon or spatula so it does not burn. Cook it for only about thirty to forty-five seconds. You want it to become fragrant and soft, but not browned. If garlic turns dark brown, it becomes extremely bitter, and you will have to wash the pan and start this step over.
Step 3: Deglazing the Pan
Pour the dry white wine (or chicken broth) into the hot pan. It will sizzle and bubble up vigorously. Use your wooden spoon to scrape up all those delicious browned bits stuck to the bottom of the skillet.
Let the wine simmer and bubble away until it has reduced by about half. This should take about three to four minutes. This step concentrated the sugars in the wine while evaporating the harsh alcohol taste, leaving behind a deep, complex, acidic foundation for your sauce.
Step 4: Creating the Cream Sauce
Turn the heat down to low. Pour in the heavy whipping cream. Stir everything together until the melted butter, garlic, and cream are fully integrated.
Let the sauce simmer gently on low heat for about three to five minutes. You do not want a rolling boil; just a gentle, lazy bubble. As the cream heats, the water inside it evaporates, naturally thickening the sauce. You will know it is ready when it is thick enough to coat the back of your wooden spoon. If you run your finger across the back of the spoon, the line should stay clean.
Step 5: Finishing and Combining
If you are using Parmesan cheese, stir it in now. Let it melt completely into the warm cream. Squeeze in your fresh lemon juice and stir. The lemon juice will cut through the richness and make the sauce taste incredibly vibrant.
Turn off the heat completely. Drop the final tablespoon of cold butter into the sauce and stir gently until it melts. This culinary technique is called monter au beurre. The cold butter emulsifies into the warm sauce, giving it a glossy, professional finish and a velvety mouthfeel.
Add the cooked shrimp, along with any savory juices that accumulated on their plate, back into the skillet. Toss them gently to coat them completely in the warm, velvety cream sauce.
Garnish the entire dish with a generous handful of finely chopped fresh parsley. Serve it immediately right out of the skillet while it is piping hot.
Crucial Mistakes to Avoid
Even with the best instructions, things can sometimes go wrong in the kitchen. Over the years, I have made almost every mistake possible with this recipe. Here are the top three pitfalls to watch out for and how to easily avoid them.
The first major mistake is leaving the shrimp in the pan while you make the sauce. I see so many recipes that tell you to sear the shrimp, push them to the side of the pan, and then pour in the wine and cream. Please do not do this.
Shrimp cooks in under four minutes. If you leave them in the skillet while you simmer and reduce the wine and cream, they will end up cooking for ten to twelve minutes. They will shrink to half their size, lose all their sweet juices, and taste like rubber erasers. Always remove them to a plate and only bring them back to the pan at the very end to warm through.
The second pitfall is burning the garlic. Because garlic is chopped into tiny pieces, it can burn in the blink of an eye. If your pan is screaming hot when you drop the garlic in, it will scorch instantly. Always lower the heat after searing the shrimp, and keep that garlic moving constantly. If you see it turning dark brown, do not proceed with the cream. Dump it out, wipe the pan with a paper towel, and start the garlic step again. It is worth the extra five minutes to save the dish from bitter ruin.
The third mistake is letting the cream boil too hard. High heat can cause even heavy cream to separate, leaving you with a greasy layer of clear butter fat floating on top of a grainy white liquid. Keep the burner on low once the cream is added. A gentle, slow simmer is all you need to reduce and thicken the sauce beautifully.
How to Serve and Pair This Masterpiece
Once your creamy garlic butter shrimp is finished, you need a vessel to carry that incredible sauce.
My absolute favorite way to serve this is over a bed of hot, freshly cooked pasta. Angel hair, linguine, or fettuccine are perfect choices because their long strands hold onto the velvety sauce beautifully. Just toss the cooked pasta directly into the skillet with the shrimp and cream sauce before serving, adding a splash of leftover pasta cooking water if the sauce gets too thick.
If you want a comforting, rustic experience, skip the pasta and serve the shrimp in a shallow bowl with a warm, crusty baguette. Tear off big chunks of bread and use them to scoop up the garlic-rich cream. It is pure heaven. For a lower-carb option, this dish is incredible served over zucchini noodles, steamed spaghetti squash, or a bed of creamy cauliflower mash. The rich sauce transforms simple vegetables into something spectacular.
When it comes to drinks, pair this dish with the same white wine you used to cook the sauce. A chilled glass of crisp Pinot Grigio or Sauvignon Blanc cuts through the rich cream and buttery shrimp beautifully, cleansing your palate between bites.
Enjoying the Fruits of Your Labor
There is something incredibly satisfying about mastering a dish that used to intimidate you. Once you make this creamy garlic butter shrimp for the first time, you will realize that great cooking is not about complicated techniques or expensive restaurant equipment. It is simply about respecting your ingredients, managing your pan heat, and trusting the process.
The next time you want a special dinner, skip the expensive seafood restaurant. Put on some music, pour yourself a glass of wine, pull out your skillet, and make this instead. Your kitchen will smell like an upscale bistro, your shrimp will be tender and juicy, and you will have the immense satisfaction of knowing you cooked it all yourself. Happy cooking!